
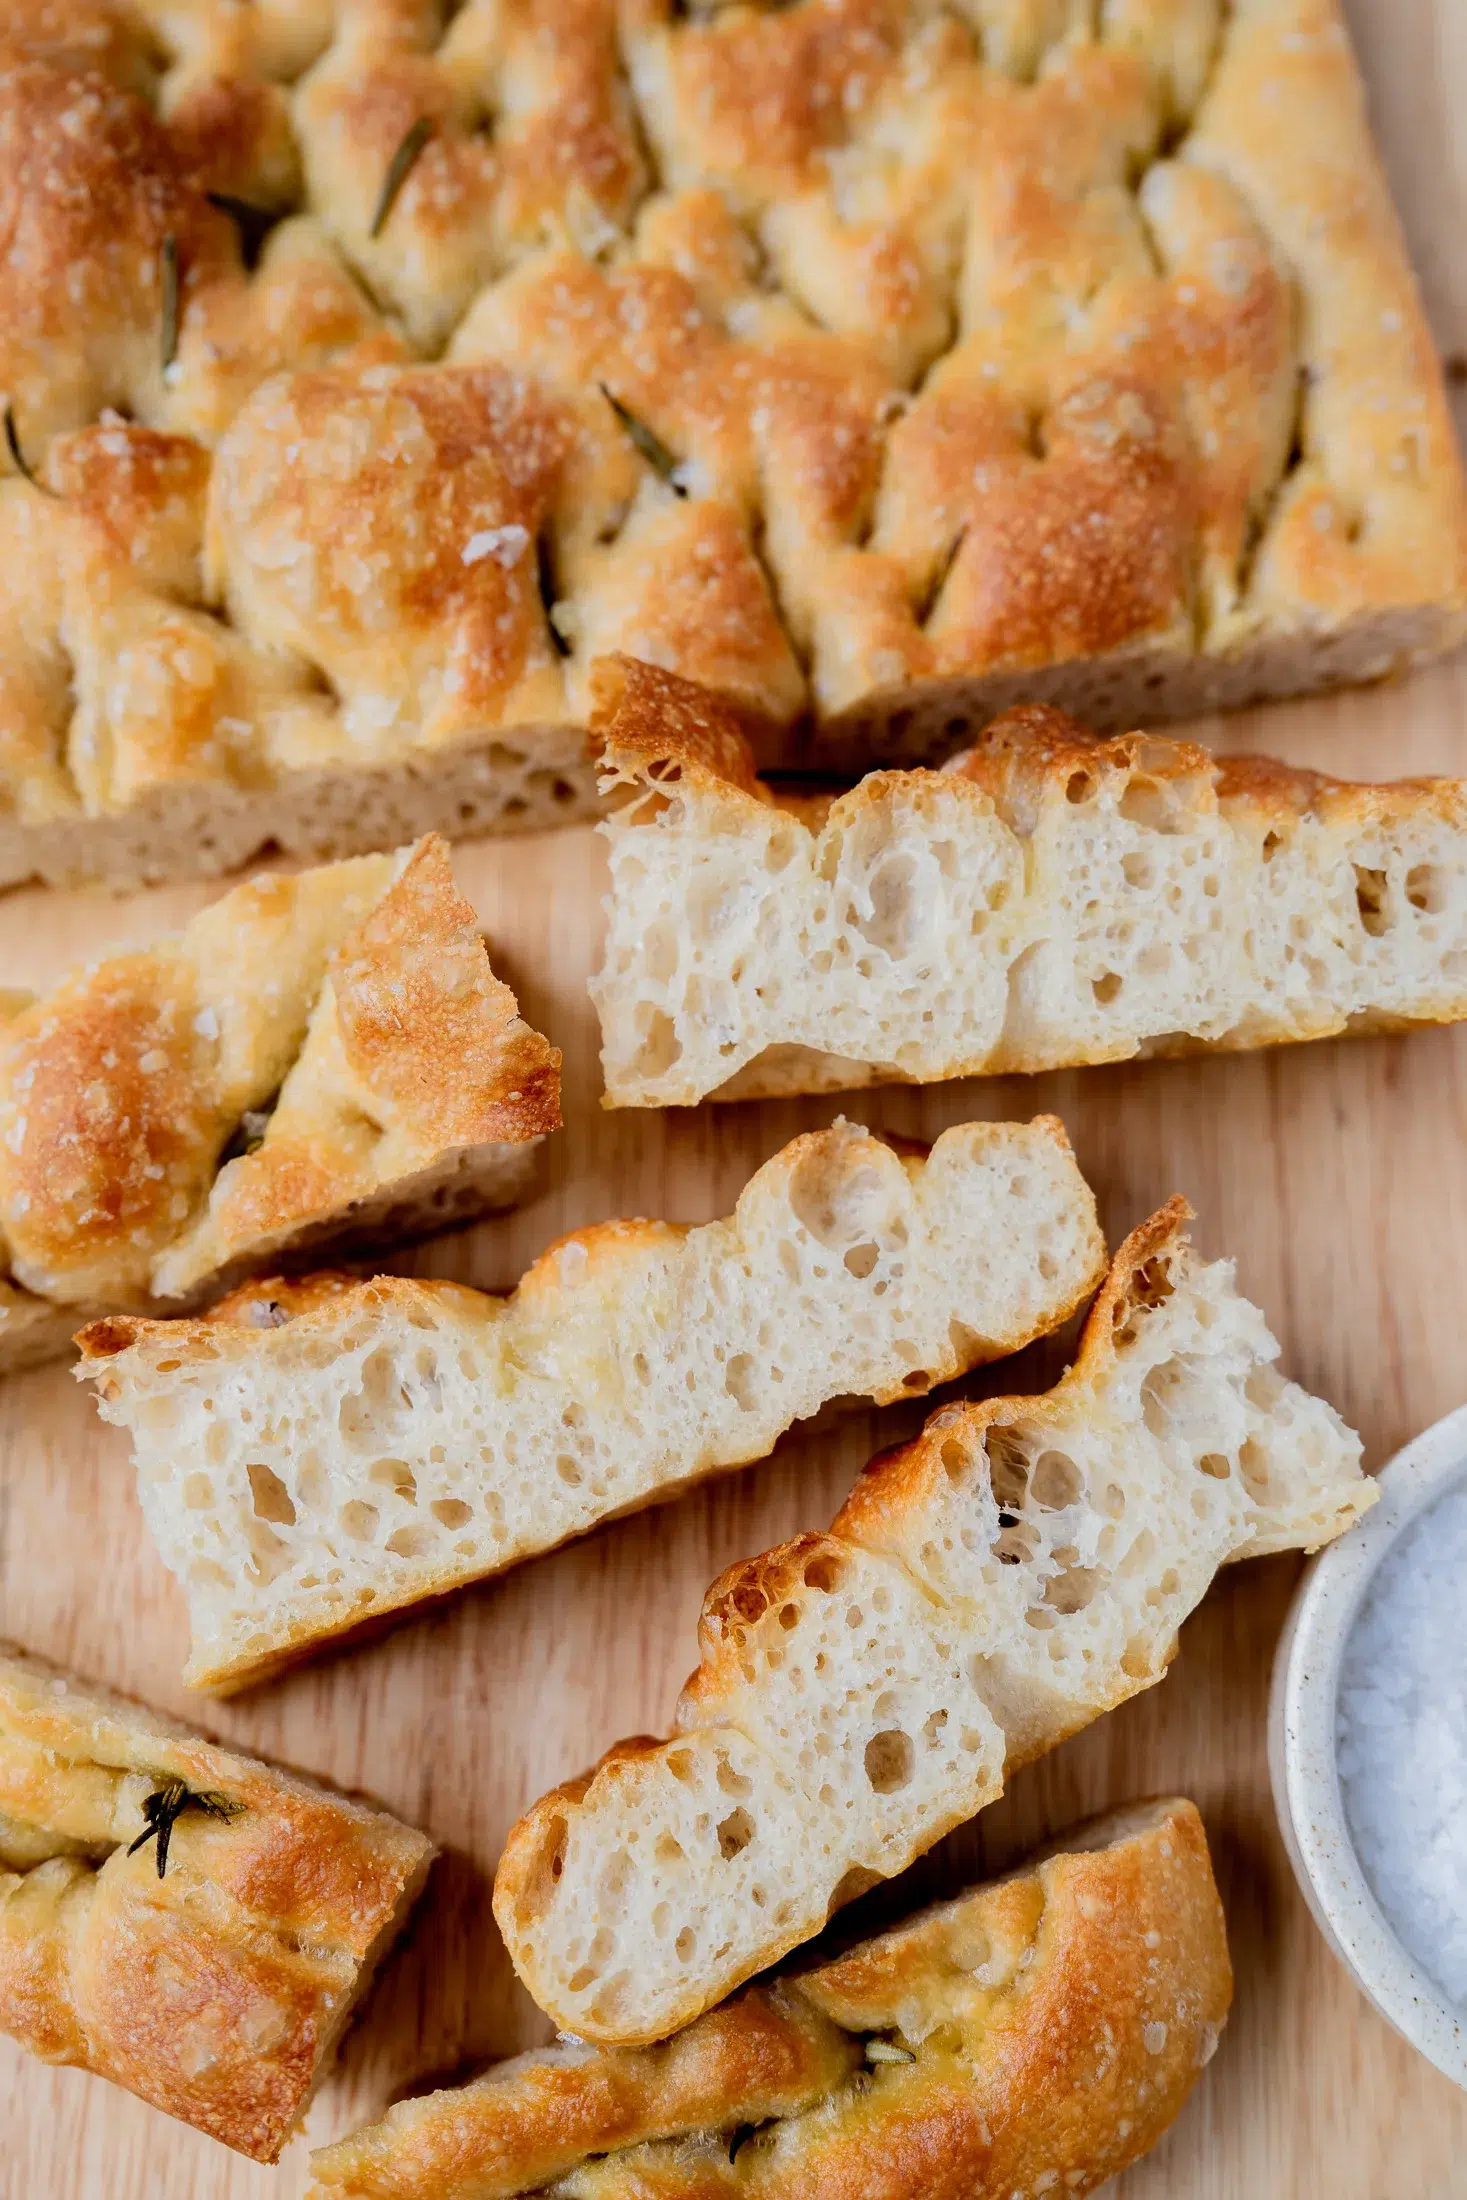
Easy No-knead Focaccia Bread Recipe (for Beginners)
Servings: 12 pieces
Calories: 418kcal
This Easy No-knead Focaccia Bread Recipe (for Beginners) is the perfect place to start if you've never made bread before. No kneading, no stand mixer and no flour-covered benchtops! Just a simple dough made in one bowl, with an overnight rest in the fridge to develop flavour and create a beautifully golden, crisp crust and soft, airy centre. Finished with fresh rosemary and flaky sea salt, it's wonderful on its own or served with gooey stracciatella cheese, mortadella and my Roasted Garlic Bread Dipping Oil. Inspired by Alexandra's Kitchen's wonderful overnight focaccia recipe.
Ingredients
- 500 g bread (strong) flour (see note 1 for measuring flour and using plain/all-purpose flour)
- 7 g instant dried yeast (see note 2 for different yeast options)
- 2 tsp fine sea salt
- 2 cups lukewarm water
- 80 ml olive oil
- Olive oil spray, for greasing
- 1 tsp fresh rosemary leaves, or a little more if desired
- Sea salt flakes, to finish
To serve (optional)
- Stracciatella cheese
- Finely sliced mortadella
- Roasted Garlic Bread Dipping Oil
Instructions
1–3 days before baking
- Make the dough – Combine the flour, yeast and fine sea salt in a large bowl. Add the lukewarm water and mix with a spatula until no dry flour remains and a rough dough forms. The dough will be very soft, wet and sticky – this is exactly how it should be. Cover with a lid or plastic wrap and leave to rest at room temperature for 30 minutes.
- Stretch and fold the dough – Wet one hand with water to stop the dough from sticking. Lift one edge of the dough, gently stretch it upwards and fold it towards the centre. Rotate the bowl slightly and repeat another seven times, working your way around the dough. It should start to feel smoother and more elastic. There's no need to knead it.
- Coat with olive oil – Drizzle 2 tablespoons of the olive oil over the dough. Using your hands, gently turn the dough to coat it all over, including underneath. Lightly spray the inside of the bowl above the dough with olive oil to help prevent sticking.
- Cover and refrigerate – Cover the bowl tightly with a lid or plastic wrap and refrigerate for at least 12 hours, or up to 3 days (see note 3). The dough will become puffier and develop bubbles as it rests. Don't worry if it hasn't tripled in size – it doesn't need to.
On the day of baking – allow approximately 4 hours before baking
- Stretch and fold the cold dough – Remove the dough from the fridge. With one lightly oiled hand, gently loosen the dough from the sides of the bowl. Lift one edge, stretch it upwards and fold it towards the centre. Rotate the bowl and repeat another seven times. Work gently to avoid knocking out too much air.
- Prepare the baking tin – Generously spray a 23 x 33 cm (9 x 13 inch) metal baking tin with olive oil, making sure to coat the base and sides. Add 1½ tablespoons of olive oil to the centre of the tin (see note 4 for baking tin options).
- Transfer the dough to the tin – Gently transfer the cold dough into the prepared tin. Carefully turn it over once so both sides are coated in olive oil. Don't punch the dough down or force it into the corners – it will spread naturally as it rests.
- Allow the dough to rise – Leave the dough uncovered at room temperature for approximately 3–4 hours, or until noticeably puffy, airy and bubbly, and it has spread towards the edges of the tin. If you gently shake the tin, the dough should wobble slightly. A cooler kitchen may require a little longer, so use the appearance of the dough as your guide rather than relying only on the time.
- Preheat the oven and add the toppings – Preheat the oven to 220°C (425°F) (200°C/400°F fan-forced). Drizzle the remaining 1½ tablespoons of olive oil evenly over the dough and scatter with the rosemary. Lightly oil your fingers, then press firmly down into the dough to create deep dimples across the surface. You can gently encourage the dough towards the corners as you go, but avoid flattening it completely. Finish with a generous sprinkle of sea salt flakes.
- Bake – Transfer the tin to the middle rack of the oven and bake for 25–30 minutes, or until deeply golden on top with crisp edges and a golden base. I find that my focaccia is cooked through at around 25 minutes, with the final 5 minutes mainly helping to develop that beautiful golden colour and crisp crust. Keep an eye on it towards the end, as ovens vary. Carefully lift one edge with a spatula to check that the underside is golden before removing it from the oven.
Notes
Note 1 – Measuring flour / Using bread flour versus plain (all-purpose) flour With baking, it's best to measure the weight of the flour rather than using cups (as metric and imperial cups are different). The precise weight of the flour is 512 g (18 oz).
Bread flour (also known as strong flour or strong bread flour) is my preference for this recipe because its higher protein content helps create a chewy, airy focaccia with a lovely structure. However, you can also use plain (all-purpose) flour if that's what you have. The dough may be slightly softer and the finished bread a little less chewy, but it will still be delicious.
Note 2 – Instant dried yeast I use instant dried yeast, which can be mixed directly into the flour without needing to be activated in water first. If using active dry yeast instead, dissolve it in the lukewarm water first and leave it for 5–10 minutes before combining it with the remaining ingredients.
Note 3 – Overnight refrigeration The dough needs at least 12 hours in the fridge, but you can leave it for up to 3 days. This makes it a great recipe to prepare ahead. The longer, slower rise helps develop flavour, and you'll notice the dough becoming puffier and developing bubbles as it rests.
Note 4 – Baking tin I use a 23 x 33 cm (9 x 13 inch) metal baking tin, which gives the focaccia a beautiful thickness and helps create a crisp, golden base. I recommend metal tins rather than glass or ceramic for the crispiest, most golden base.
Make Ahead
This is a fantastic recipe to prepare ahead, as the dough needs at least 12 hours in the fridge and can be refrigerated for up to 3 days before baking. Once you've made the dough and completed the first stretch-and-fold in step 2, coat it in olive oil, cover tightly and refrigerate until you're ready to use it. On the day of baking, allow approximately 3–4 hours for the dough to rise in the tin at room temperature before adding your toppings and baking. This makes it a great option for entertaining, as you can do most of the preparation a day or two in advance. Baked focaccia can also be frozen – see the Leftovers instructions below.Leftovers
Store – Focaccia is best enjoyed freshly baked, but leftovers can be stored in an airtight container at room temperature for up to 2 days. If serving with stracciatella and mortadella, store these separately in the fridge. Freeze – Allow the focaccia to cool completely, then slice into portions and wrap individually in plastic wrap. Transfer to a freezer-safe bag or container and freeze for up to 3 months. Reheat – For the best texture, warm leftover focaccia in a 200°C (400°F) (180°C/350°F fan-forced) oven for 5–8 minutes, or until heated through with a crisp crust. If frozen, thaw at room temperature first, then reheat in the oven for 5–10 minutes. This helps bring back that lovely golden, crisp exterior.Recipe source
Recipe inspired by Alexandra's Kitchen's wonderful Overnight Focaccia recipeNutrition Facts
Easy No-knead Focaccia Bread Recipe (for Beginners)
Serving Size
102 g
Amount per Serving
Calories
418
% Daily Value*
Fat
15
g
23
%
Saturated Fat
2
g
13
%
Polyunsaturated Fat
2
g
Monounsaturated Fat
10
g
Sodium
1116
mg
49
%
Potassium
160
mg
5
%
Carbohydrates
58
g
19
%
Fiber
2
g
8
%
Sugar
2
g
2
%
Protein
10
g
20
%
Calcium
19
mg
2
%
Iron
1
mg
6
%
* Percent Daily Values are based on a 2000 calorie diet.
Scan for full recipe:
