

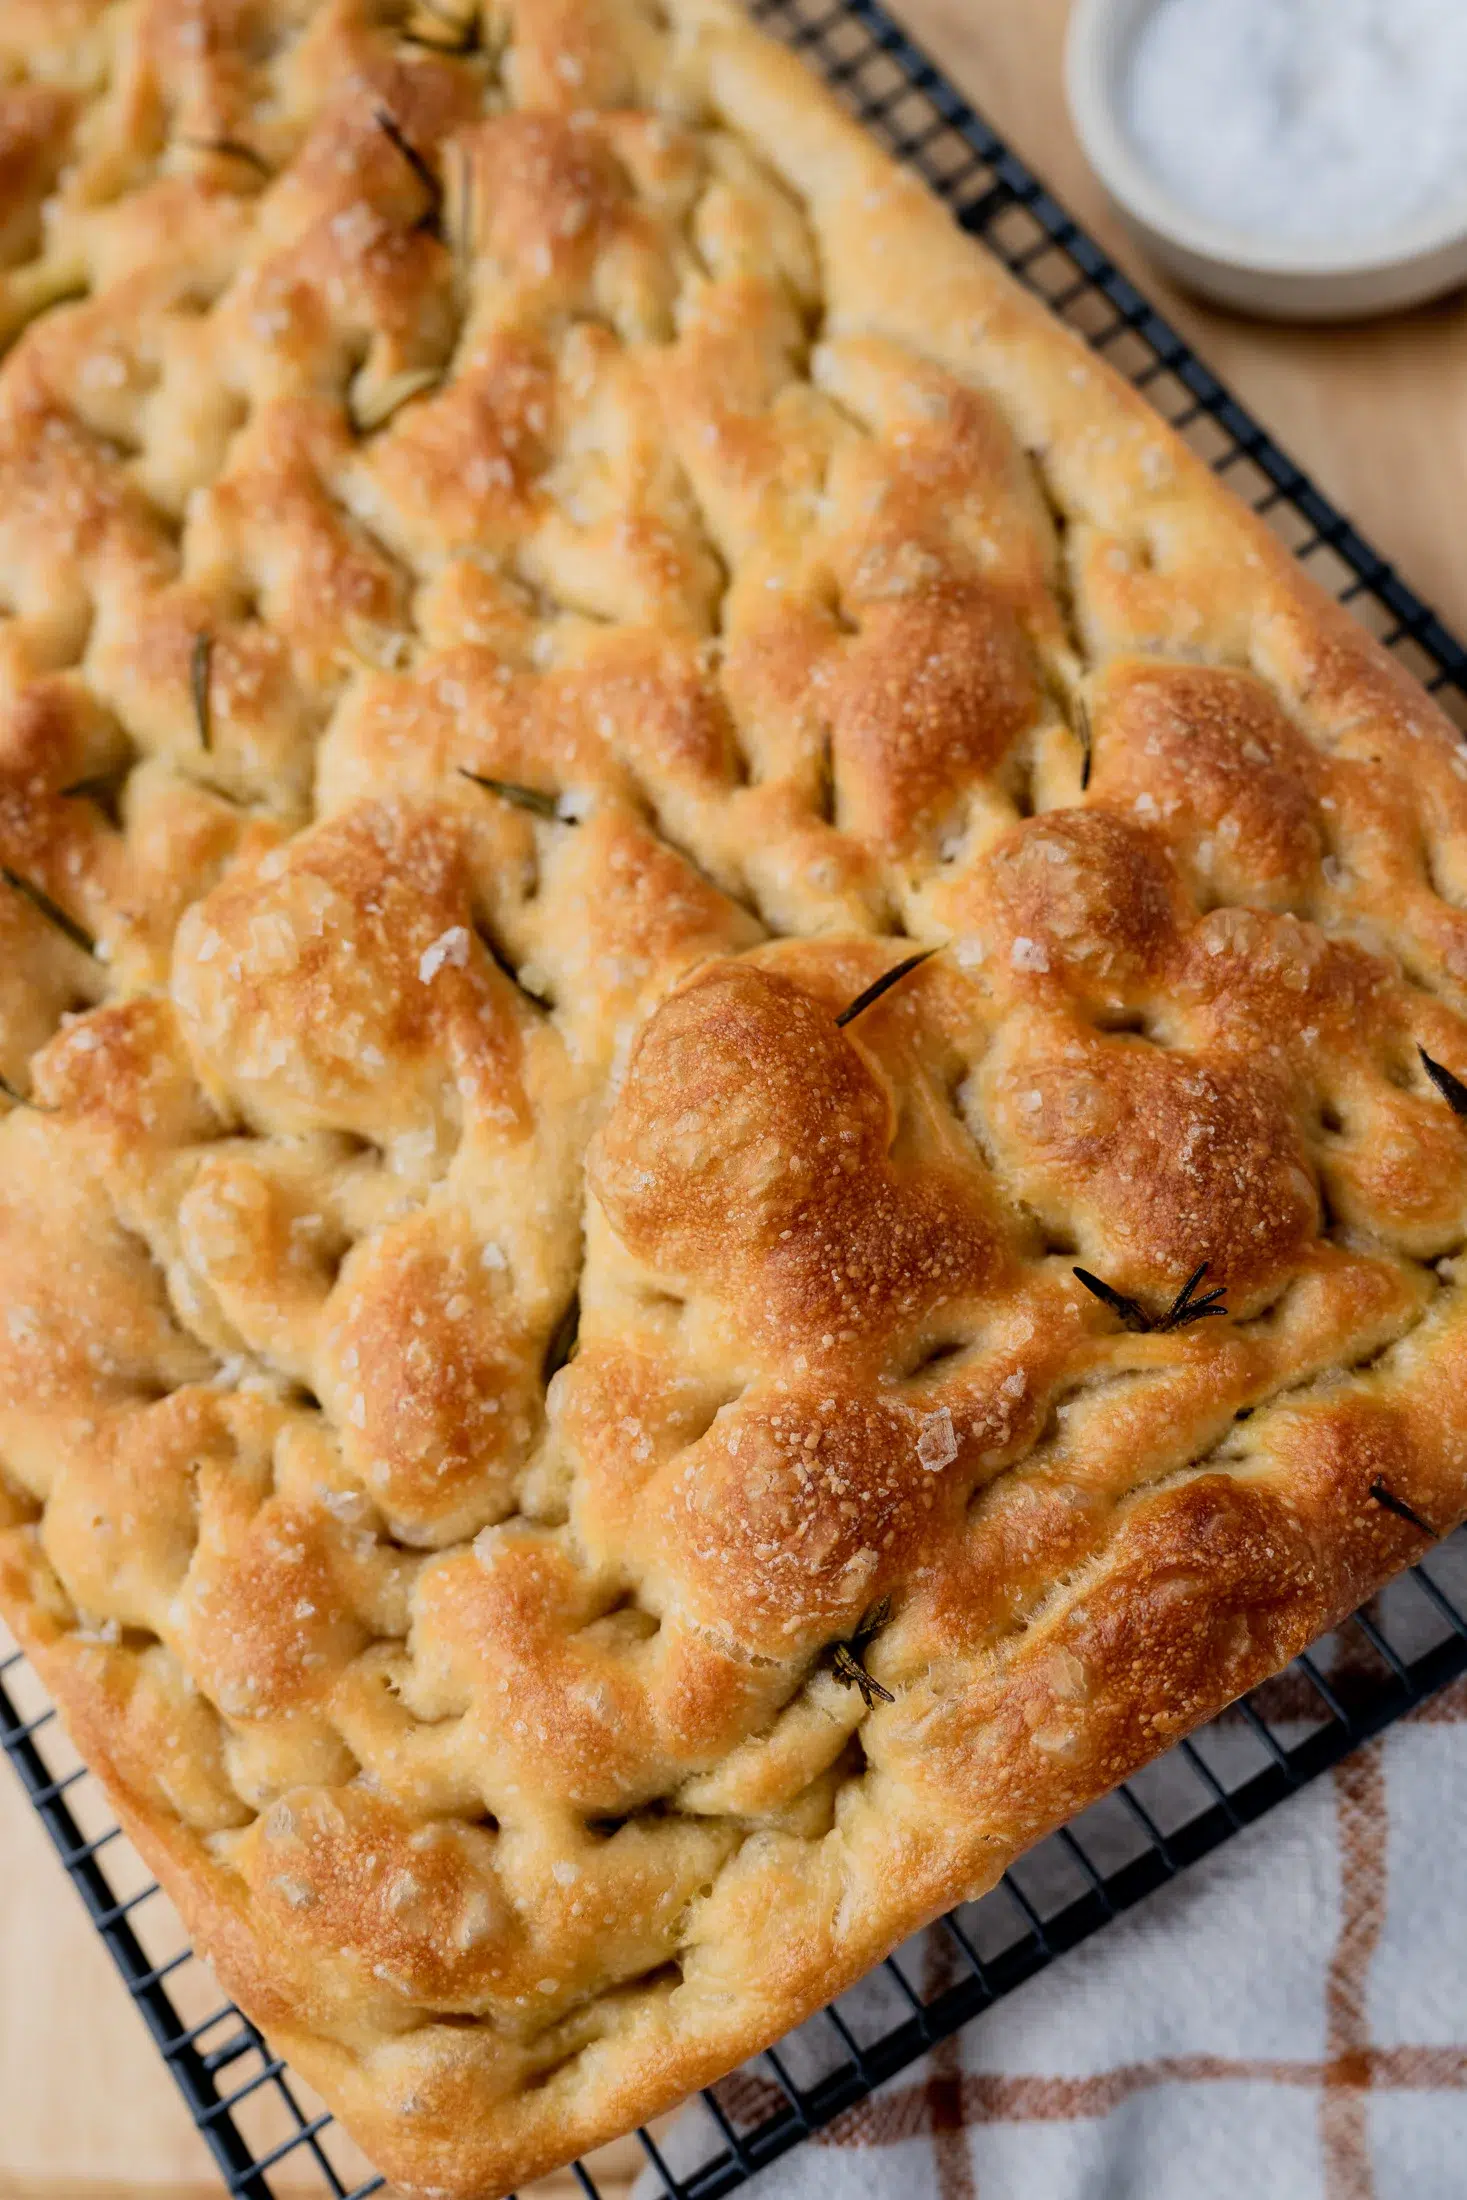




This Easy No-knead Focaccia Bread Recipe is made entirely in one bowl, with no kneading, no stand mixer and very little hands-on work.
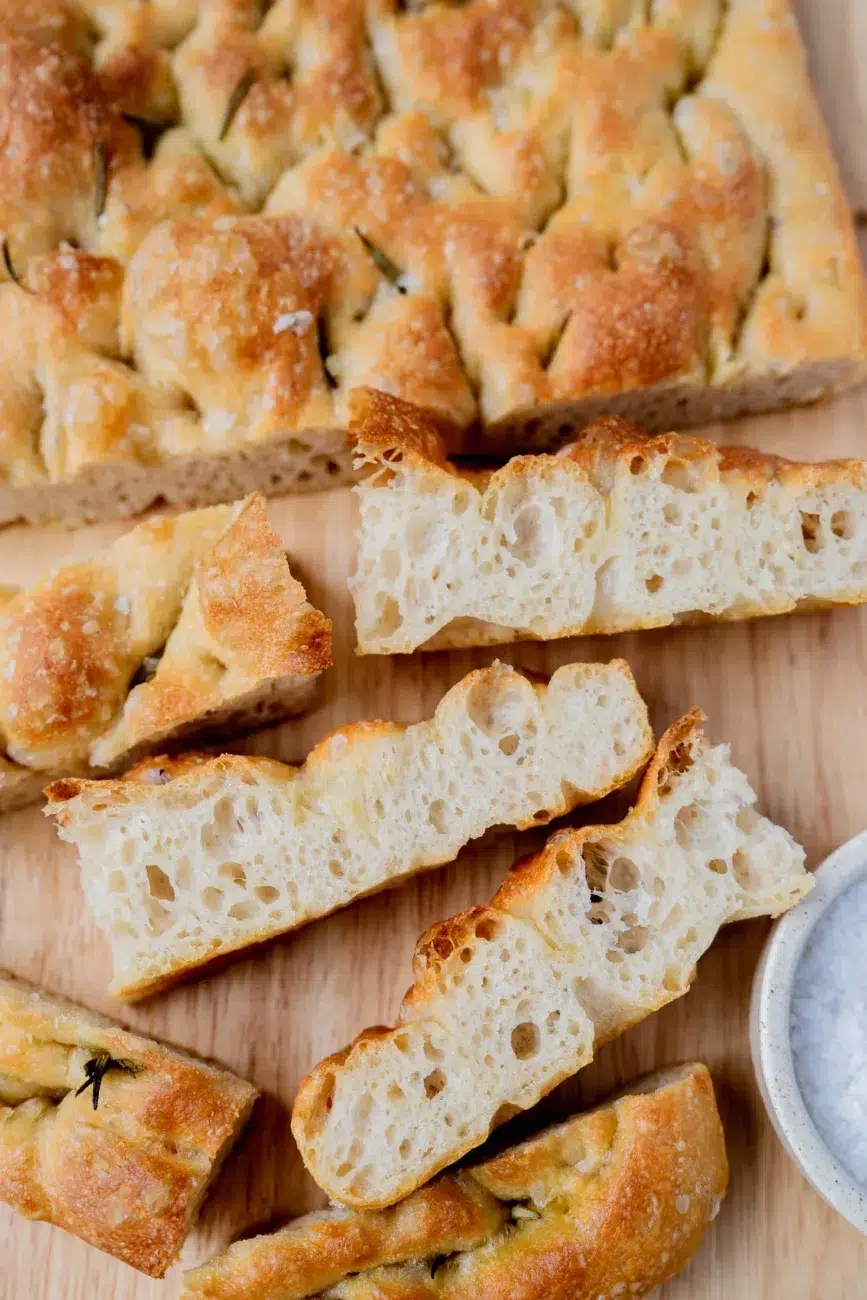
This is such a brilliant dough, particularly if you’ve never made bread before. There’s no kneading, no stand mixer and absolutely no need to cover your kitchen benchtop in flour. 😂 Everything happens in one bowl, and the only thing you really need is a little bit of time. The result is the most beautiful homemade focaccia with a golden, crisp crust, a soft, airy centre and plenty of olive oil. It’s one of those recipes that makes you feel like you’ve achieved something quite spectacular. The recipe may look long but I promise the process is easy!
I’ve been on a mission for quite some time to find an incredible homemade focaccia recipe perfect for beginners. There are so many recipes online, and it can be difficult to know where to start. Broadly speaking, there are two approaches: a quick focaccia that you can make in a few hours, and a slower version where the dough rests in the fridge overnight. This recipe is the second kind and, after trying different methods, I really do think it’s worth giving the dough that extra time. The flavour and texture are incredible, and most of that time is completely hands-off.
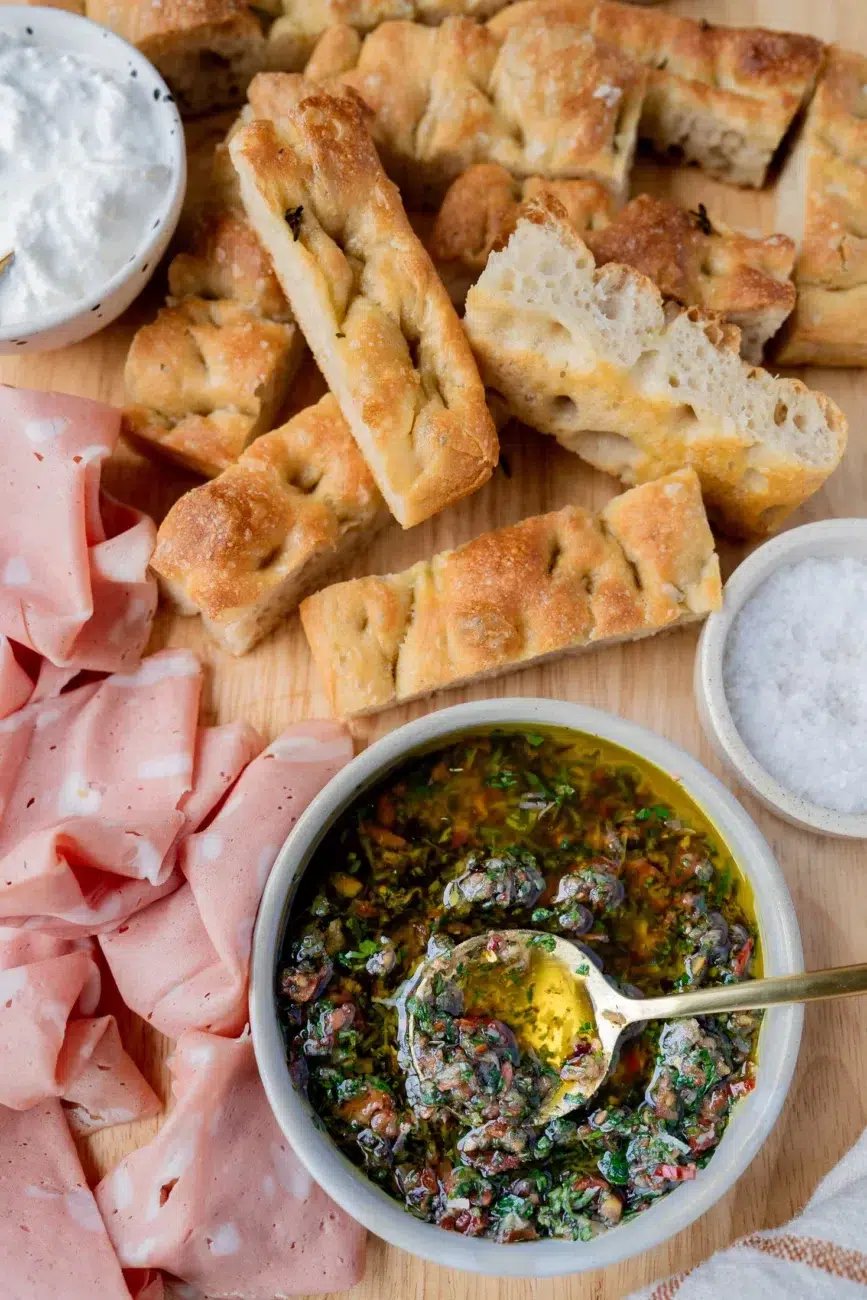
My recipe was inspired by Alexandra’s Kitchen’s overnight focaccia, which was the best starting point I found during all my experimenting. I’ve adapted the method to make it as straightforward as possible, using plenty of olive oil, finishing it simply with fresh rosemary and flaky sea salt and of course a very special Roasted Garlic Dipping Oil. It’s such a beautiful combination and the kind of thing I love putting in the middle of the table when people come over, especially when teamed with other little bits like soft stracciatella cheese and mortadella. While I’ve included lots of serving suggestions in the recipe, I have to say, this focaccia is also equally wonderful warm, straight from the oven with absolutely nothing on it.
The thing I really want you to know is that making beautiful homemade bread doesn’t have to be difficult. You don’t need any special skills or equipment. You just need a little planning, a bit of patience and a bowl. And when you pull that golden, bubbling focaccia out of the oven, I promise you’ll be very glad you made the time for it.
Your first focaccia starts here!
How I love to serve this focaccia
This focaccia is absolutely beautiful served warm, straight from the oven with just a little olive oil and sea salt flakes, but there are so many ways to enjoy it! It’s just as good served alongside dinner as it is turned into something a little more special when entertaining. Here are some of my favourite ways to serve it:
- With Roasted Garlic Dipping Oil, mortadella and stracciatella cheese – This is how I serve the focaccia in the photos, and it’s such a beautiful combination! I arrange everything on a large platter, slice the focaccia into pieces and let everyone help themselves. My garlic oil is packed with roasted garlic, semi-dried (sun-blushed) tomatoes, parmesan and herbs, and is perfect for dipping.
- With good-quality olive oil and balsamic vinegar – Sometimes the simplest things are the best. Pour a little extra-virgin olive oil and balsamic vinegar into a shallow dish, add a pinch of sea salt flakes and serve with the warm focaccia.
- With whipped ricotta and hot honey – Spread whipped ricotta over a plate, drizzle generously with hot honey and finish with cracked black pepper and fresh thyme. Scoop it all up with pieces of focaccia.
- As a sandwich – Slice the focaccia horizontally and fill it with prosciutto, mozzarella, tomato, rocket (arugula) and pesto. It’s also beautiful with grilled vegetables or my Mediterranean Roasted Vegetables, cheese and a little balsamic glaze.
- With burrata and tomatoes – Arrange some burrata on a platter with ripe tomatoes, fresh basil, olive oil and sea salt. Serve with the warm focaccia to scoop everything up.
- Alongside soups and stews – It’s perfect for soaking up all those lovely sauces and broths. I especially love serving it with tomato soup, minestrone or a slow-cooked beef stew.
- With an antipasto platter – Serve it with your favourite cheeses, cured meats, marinated olives, roasted capsicum (bell pepper), artichokes and dips. An easy way to make a beautiful grazing platter feel a little more substantial.
- With garlic and herb butter – Warm the focaccia slightly and serve with softened butter mixed with roasted garlic, flat-leaf parsley and sea salt. So simple and delicious.
- Alongside pasta – Particularly good with saucy pasta dishes like bolognese, creamy tomato pasta or lasagne. Perfect for mopping up every last bit of sauce.
- Toasted for breakfast or brunch – Slice and lightly toast the focaccia, then top with scrambled eggs, avocado, crispy bacon or a fried egg with chilli oil.
- As a pizza-style bread – Top leftover focaccia with tomato sauce, mozzarella and your favourite pizza toppings, then bake until the cheese is melted and bubbling.
- Turn leftovers into croutons – Cut into cubes, toss with olive oil and bake until golden and crunchy. They’re beautiful scattered over salads or soups.
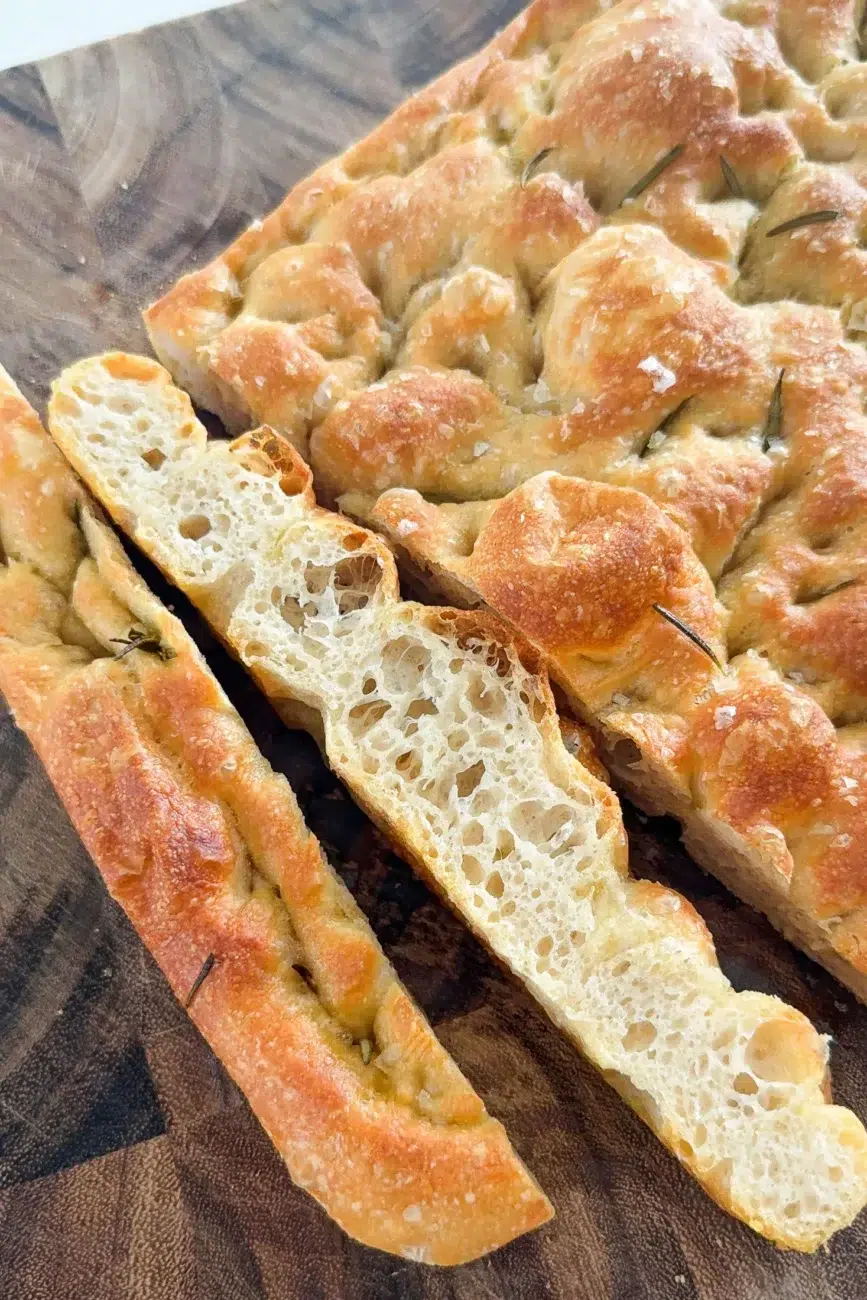
Why is my focaccia dense instead of light and airy?
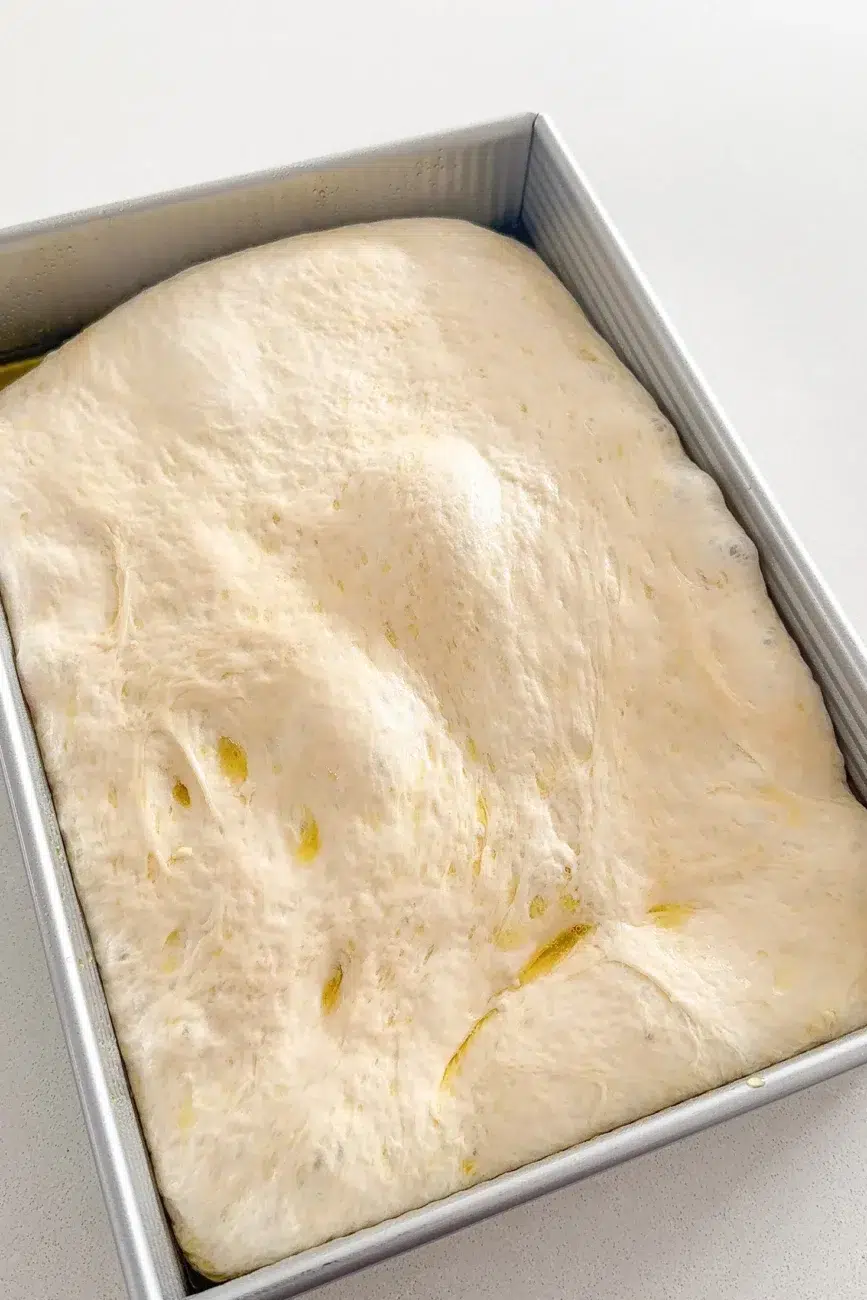
The most common reason is that the dough hasn’t had enough time to rise, particularly after being removed from the fridge. Before baking, the dough should look noticeably puffy, with bubbles beneath the surface, and wobble slightly when you gently shake the tin. If your kitchen is cool, this can take longer than the suggested 2–4 hours. Adding too much flour or pressing too firmly when handling the dough can also affect the texture. Remember, this is supposed to be a very wet, sticky dough!
Why didn’t my focaccia dough rise?
First, check that your yeast is fresh and hasn’t expired. The water should be lukewarm, not hot, as excessive heat can damage the yeast. Keep in mind that dough rises much more slowly in the fridge, so it may not increase dramatically in size overnight. The most noticeable rise often happens once the dough has been transferred to the tin and left at room temperature. Give it enough time to become visibly puffy before baking.
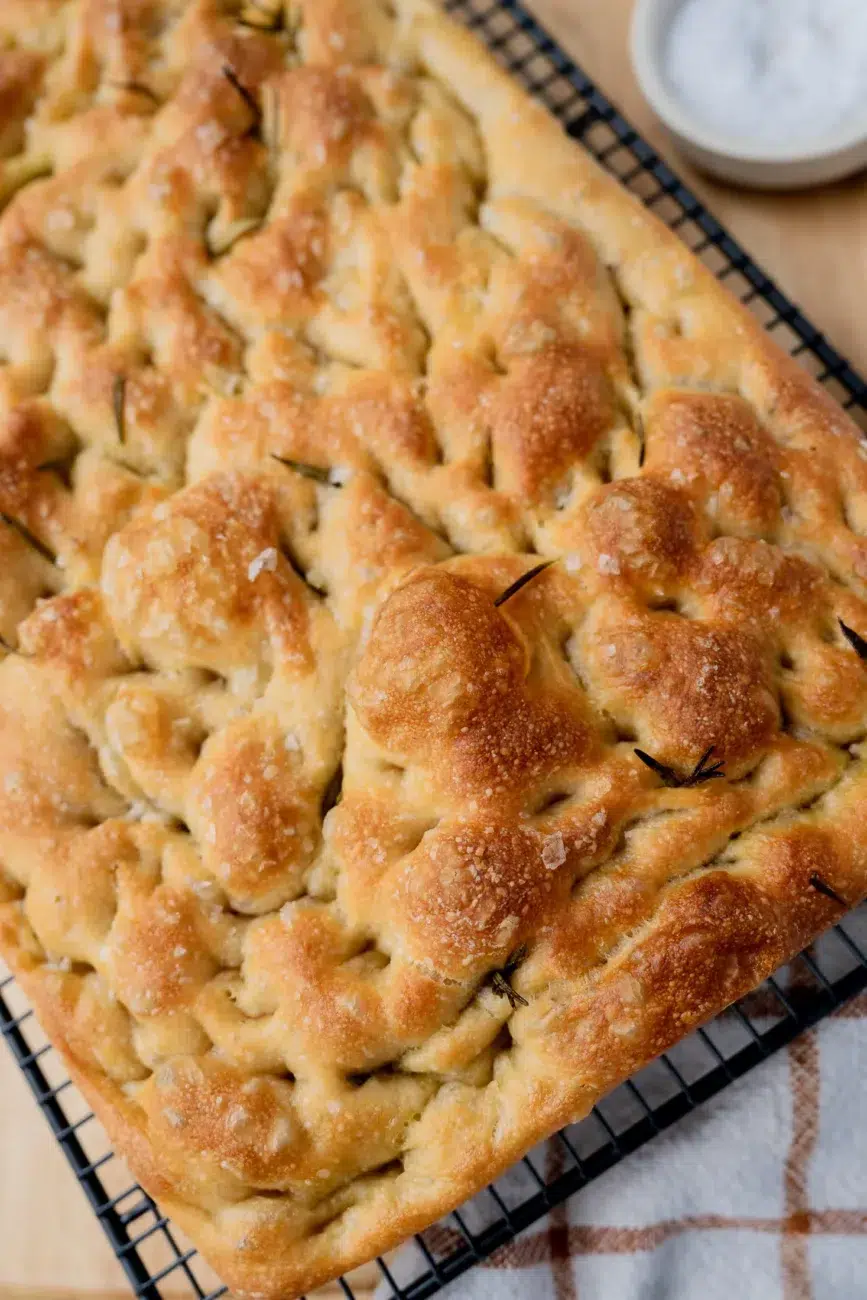
How do I store leftover homemade focaccia?
Focaccia is best enjoyed on the day it’s baked, when the crust is beautifully crisp and the centre is soft and airy. If you have leftovers, allow them to cool completely, then store in an airtight container or well-wrapped in plastic wrap at room temperature for up to 2 days. I prefer not to refrigerate plain focaccia, as it can dry out and become firm. To bring back that freshly baked texture, warm it in a 200°C (400°F) (180°C/350°F fan-forced) oven for approximately 5–8 minutes, or until heated through and crisp around the edges. However, focaccia with perishable toppings should be refrigerated.
Can I freeze homemade focaccia?
Yes! Focaccia freezes beautifully, which makes it a great option to prepare ahead. Allow it to cool completely, then cut it into portions and wrap them individually in plastic wrap before placing them in a freezer-safe bag or container. Freeze for up to 3 months for the best quality. Thaw at room temperature, then warm in a 200°C (400°F) (180°C/350°F fan-forced) oven for approximately 5–10 minutes, or until heated through with a crisp crust.
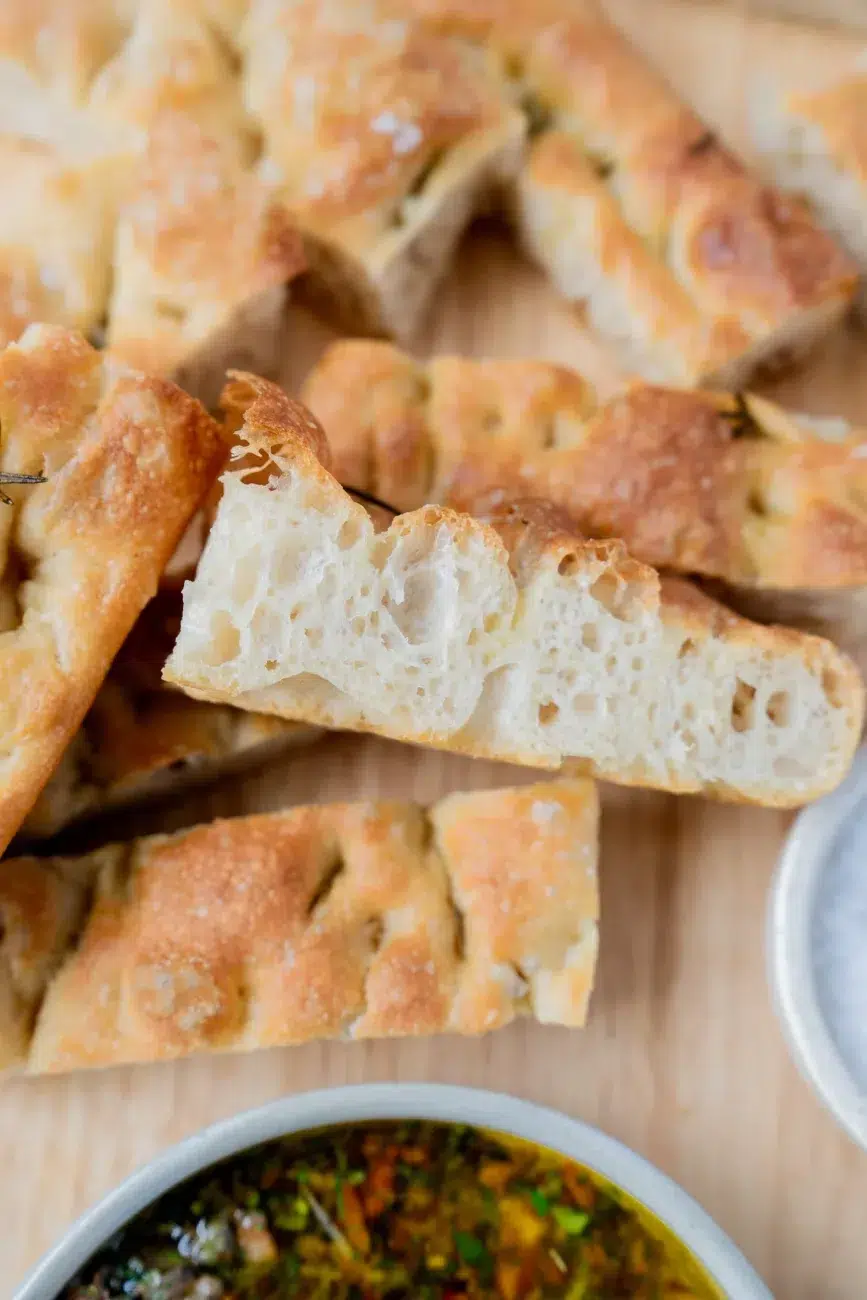
Can I use different toppings on homemade focaccia?
Absolutely! This dough is a wonderful base for experimenting with different flavours. I’ve kept this recipe simple with fresh rosemary and sea salt flakes, which is one of my favourite combinations, but there are so many delicious variations you can try.
Here are a few of my favourites:
- Black olive, parmesan and balsamic glaze – Gently press pitted black olives into the dough before baking and sprinkle with finely grated parmesan. Once baked, finish with a drizzle of sweet, sticky balsamic glaze and a little extra parmesan. The combination of salty olives, parmesan and sweet balsamic is beautiful.
- Cherry tomato and basil – Gently press halved cherry tomatoes (cut-side up) into the dough, drizzle with olive oil and sprinkle with sea salt flakes. Once baked, finish with fresh basil leaves and a little extra-virgin olive oil.
- Caramelised onion and thyme – Scatter cooled, caramelised onions over the dough, gently pressing them into the dimples. Add fresh thyme leaves and sea salt flakes before baking. Beautifully sweet and savoury.
A few tips: Add your toppings after dimpling the dough, just before baking. Avoid overloading the surface, as too many toppings can weigh down the focaccia or make it soggy. Drain any ingredients packed in oil or brine, and save delicate herbs like fresh basil and finishing glazes for adding after baking. One thing to be mindful of is fresh garlic, particularly when finely sliced or finely chopped, as it can burn in the hot oven and become bitter. If you love garlic, I’d recommend gently pressing soft roasted garlic cloves into the dough or brushing the focaccia with garlic-infused olive oil after baking instead. And remember, you don’t need lots of toppings to make a beautiful focaccia. Sometimes less really is more!
If you enjoyed Easy No-knead Focaccia Bread Recipe (for Beginners), I think you’ll love:
- 2 Ingredient Flatbread Recipe – Made with just self-raising flour and Greek yoghurt, this flatbread is ideal for serving with curries, dips and even as a quick pizza base. There’s a coriander (cilantro) butter to brush onto the bread for extra delicious flavour.
- Freezer-friendly Garlic Bread Recipe – This deliciously cheesy garlic bread is ideal to prepare and store in the freezer until you’re ready to thaw, bake and serve it alongside barbecues, pasta or pizza. On the table in 20 minutes.
- 5 Minute Cheesy Garlic Bread Recipe – There’s only one thing better than garlic bread, and that’s CHEESY garlic bread – especially when it only takes 10 minutes to make!
- Cheesy Pull-apart Garlic Bread Recipe – Warm, cheesy garlic bread just made for sharing with family or friends, with a crispy crust and buttery garlic flavour. Ready in under 40 minutes or prep ahead for convenience. Impress your guests with this one!
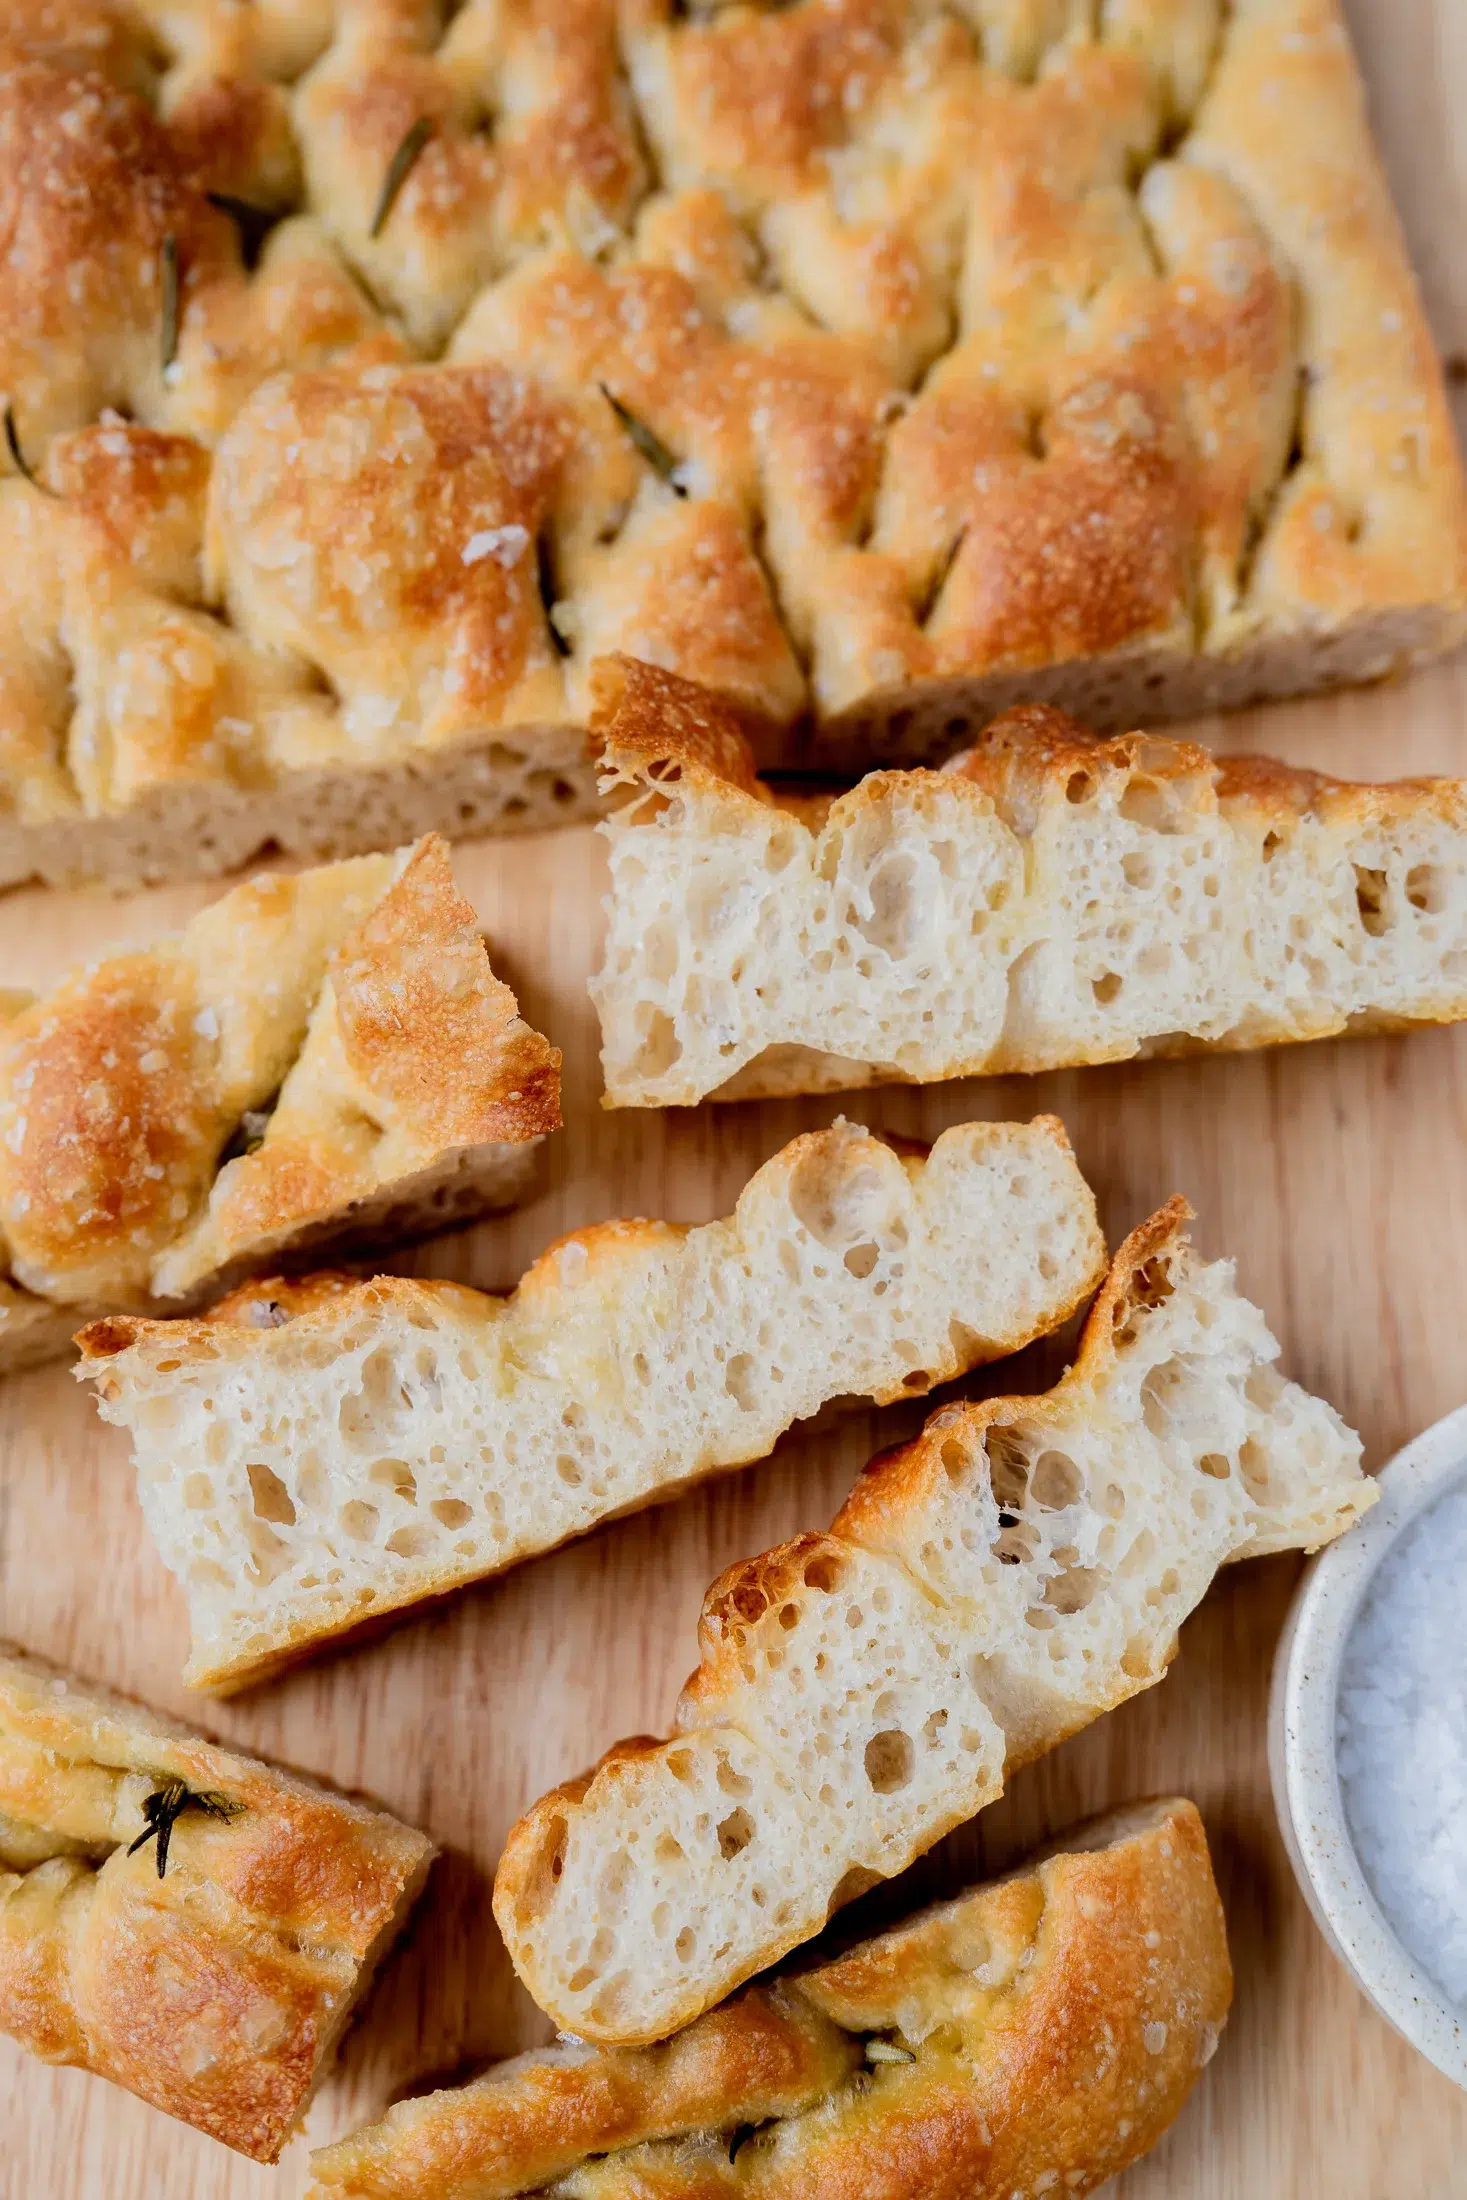
Easy No-knead Focaccia Bread Recipe (for Beginners)
“Just pulled mine out of the oven, smells delicious 😋” Share Pin Recipe PrintIngredients
- 500 g (1 lb) bread (strong) flour (see note 1 for measuring flour and using plain/all-purpose flour)
- 7 g (2 tsp) instant dried yeast (see note 2 for different yeast options)
- 2 tsp fine sea salt
- 2 cups lukewarm water
- 80 ml (⅓ cup) olive oil
- Olive oil spray, for greasing
- 1 tsp fresh rosemary leaves, or a little more if desired
- Sea salt flakes, to finish
- Stracciatella cheese
- Finely sliced mortadella
- Roasted Garlic Bread Dipping Oil
Instructions
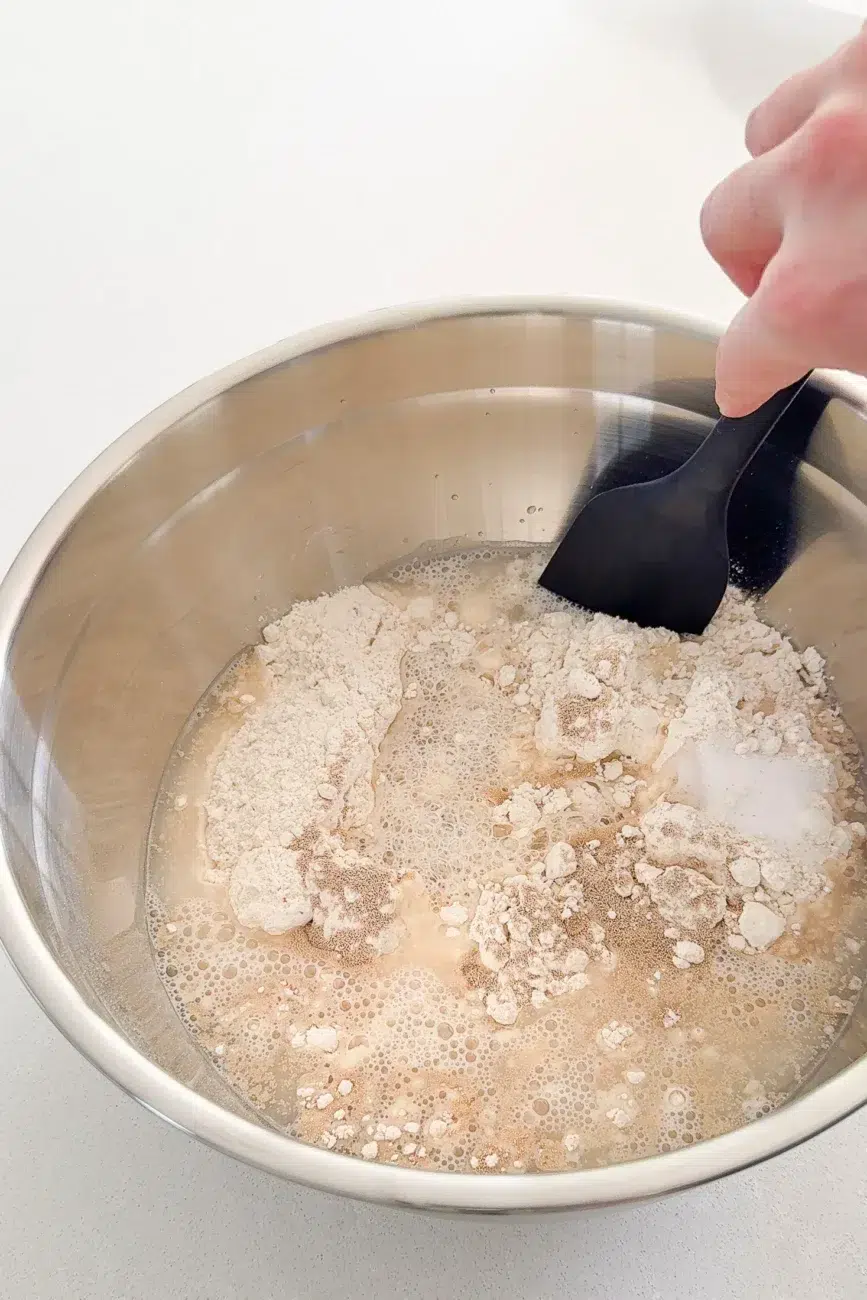
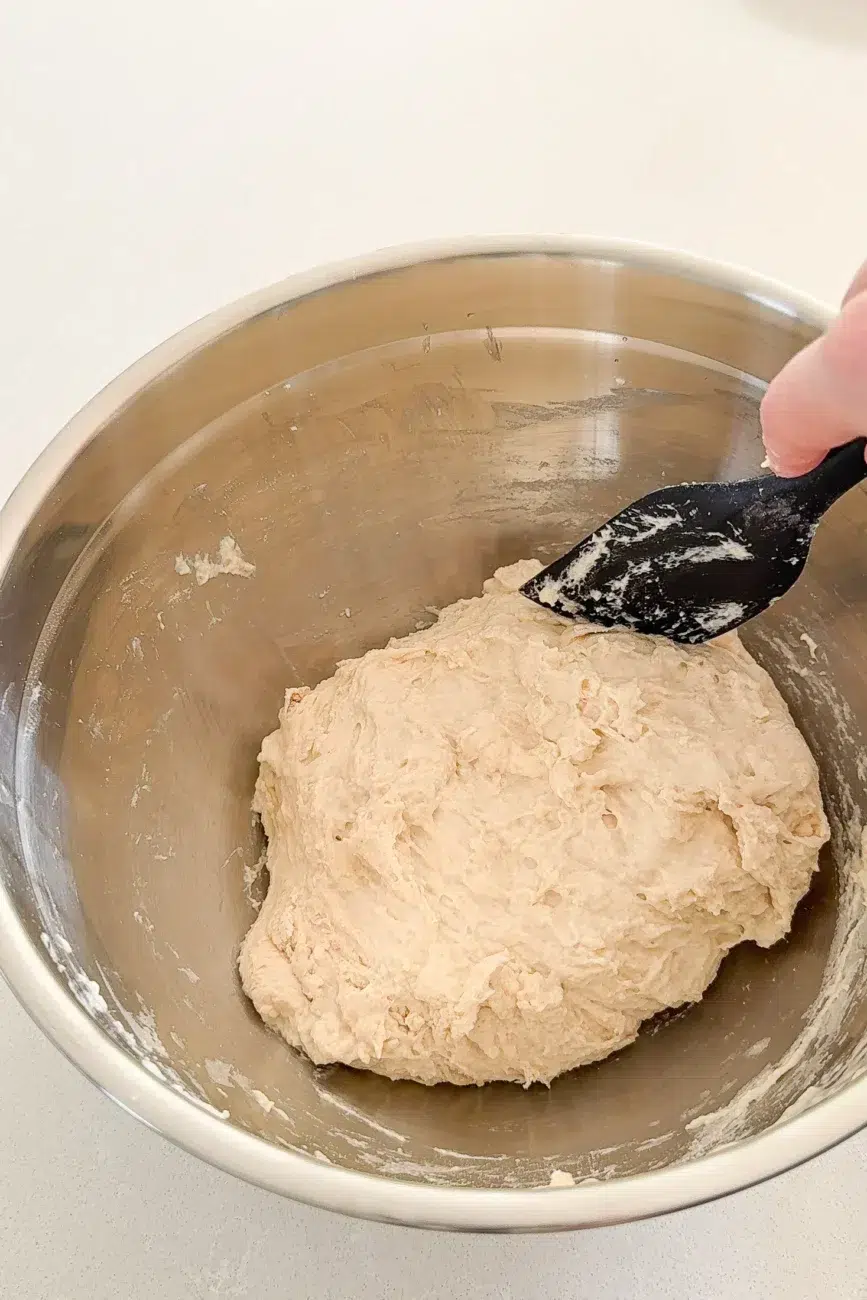
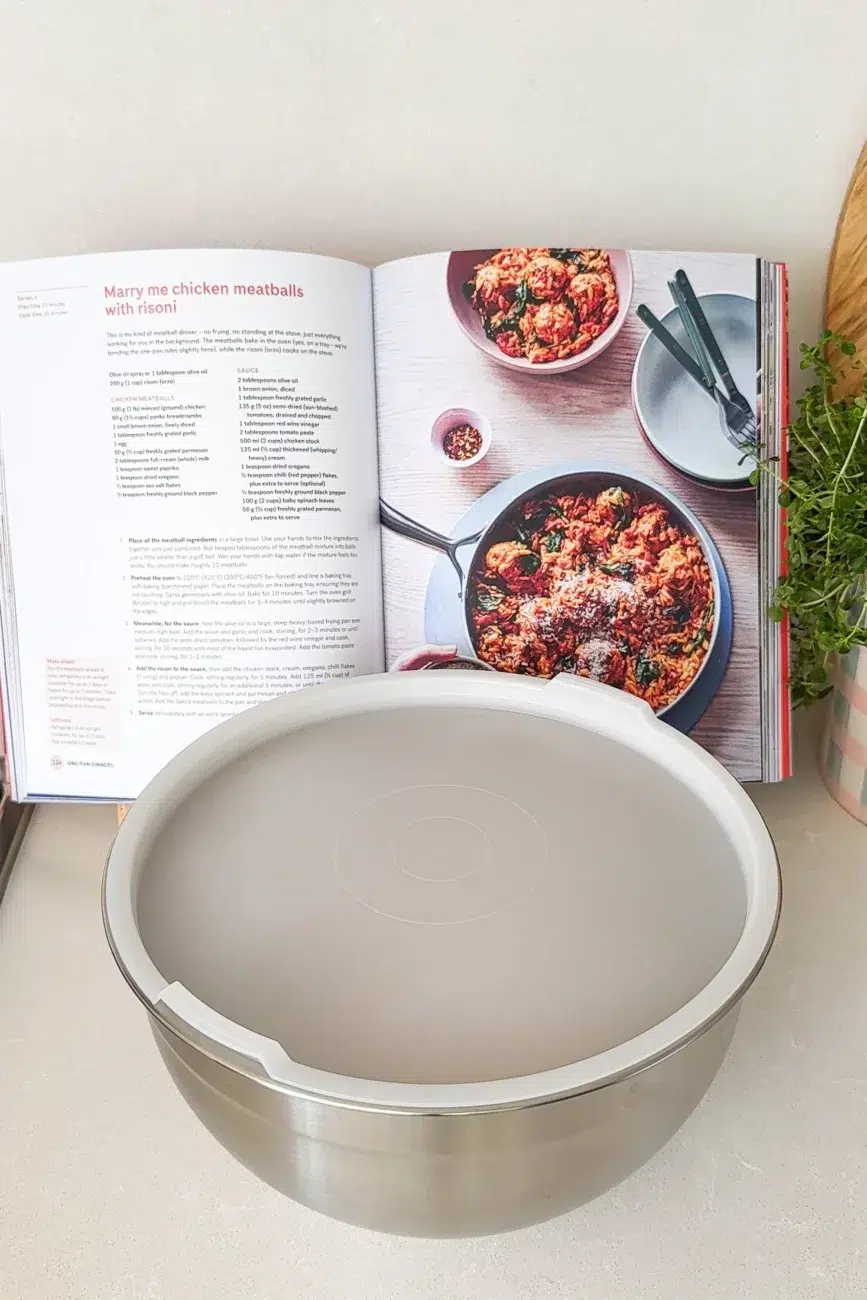
- Make the dough – Combine the flour, yeast and fine sea salt in a large bowl. Add the lukewarm water and mix with a spatula until no dry flour remains and a rough dough forms. The dough will be very soft, wet and sticky – this is exactly how it should be. Cover with a lid or plastic wrap and leave to rest at room temperature for 30 minutes.
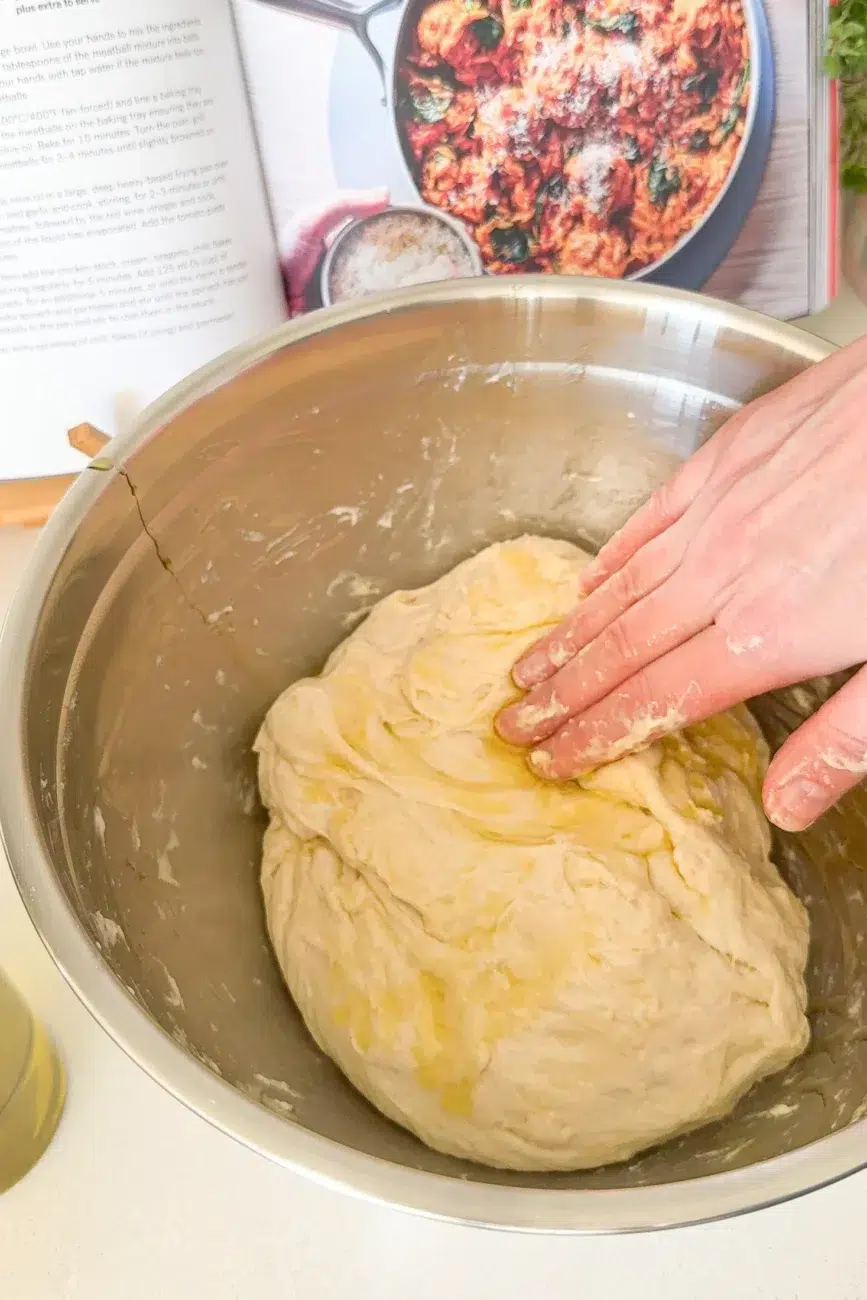
- Stretch and fold the dough – Wet one hand with water to stop the dough from sticking. Lift one edge of the dough, gently stretch it upwards and fold it towards the centre. Rotate the bowl slightly and repeat another seven times, working your way around the dough. It should start to feel smoother and more elastic. There's no need to knead it.
- Coat with olive oil – Drizzle 2 tablespoons of the olive oil over the dough. Using your hands, gently turn the dough to coat it all over, including underneath. Lightly spray the inside of the bowl above the dough with olive oil to help prevent sticking.
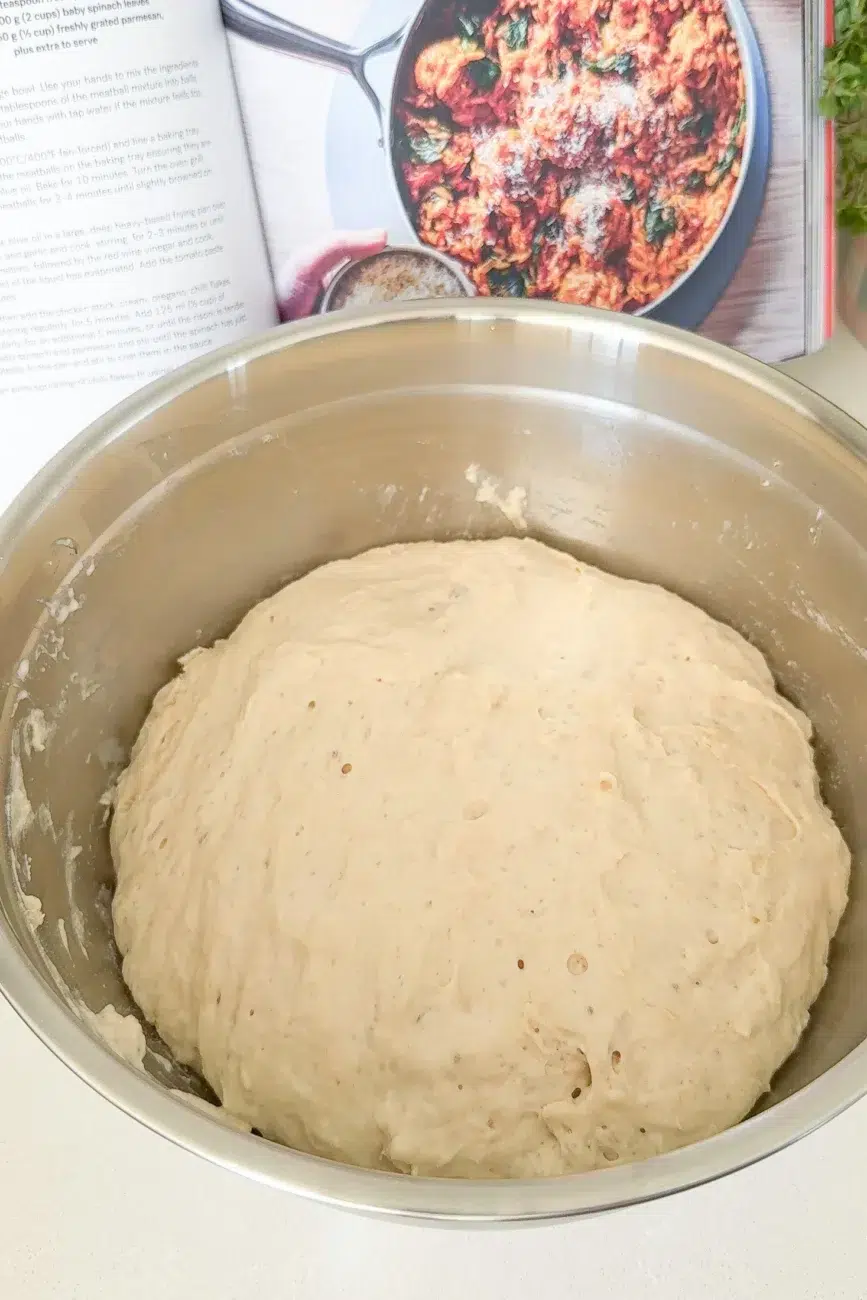
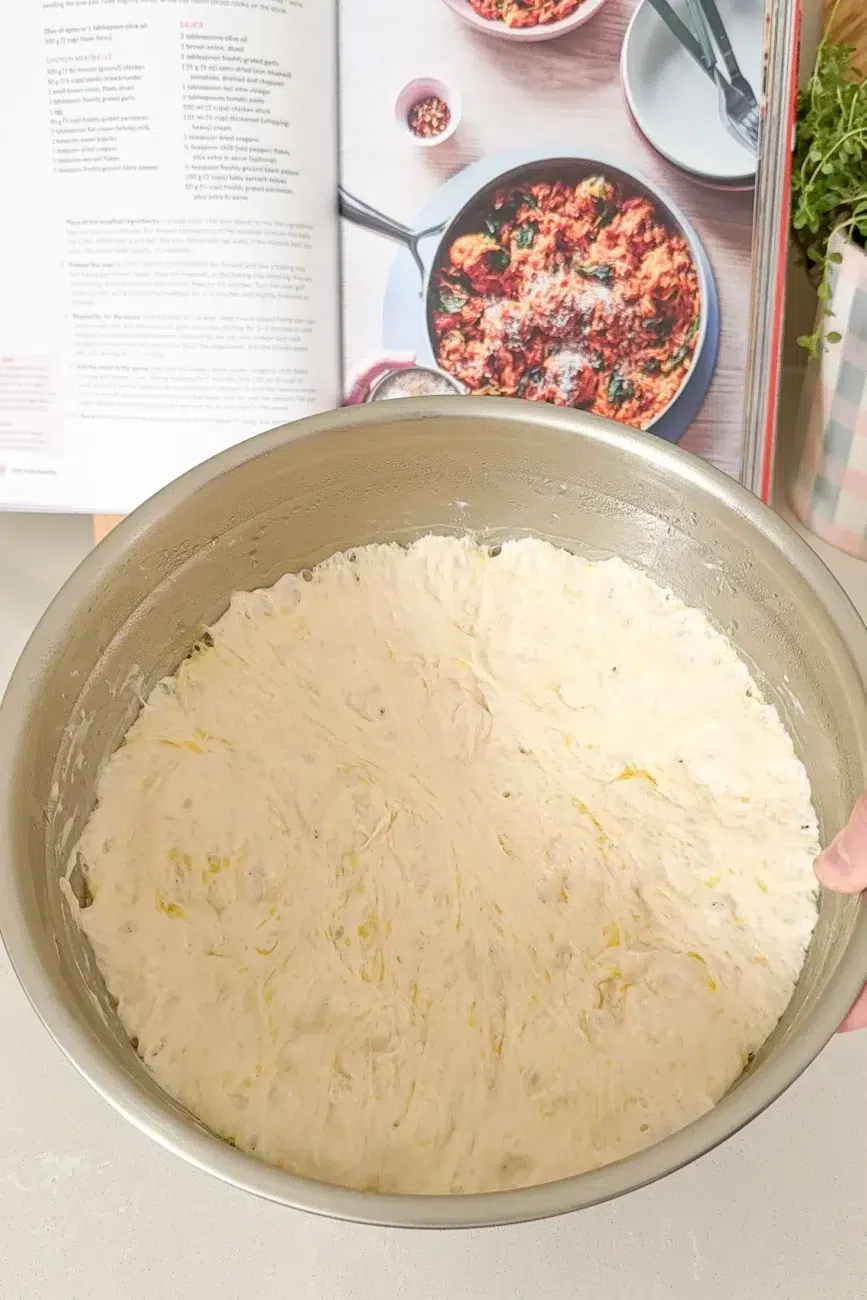
- Cover and refrigerate – Cover the bowl tightly with a lid or plastic wrap and refrigerate for at least 12 hours, or up to 3 days (see note 3). The dough will become puffier and develop bubbles as it rests. Don't worry if it hasn't tripled in size – it doesn't need to.
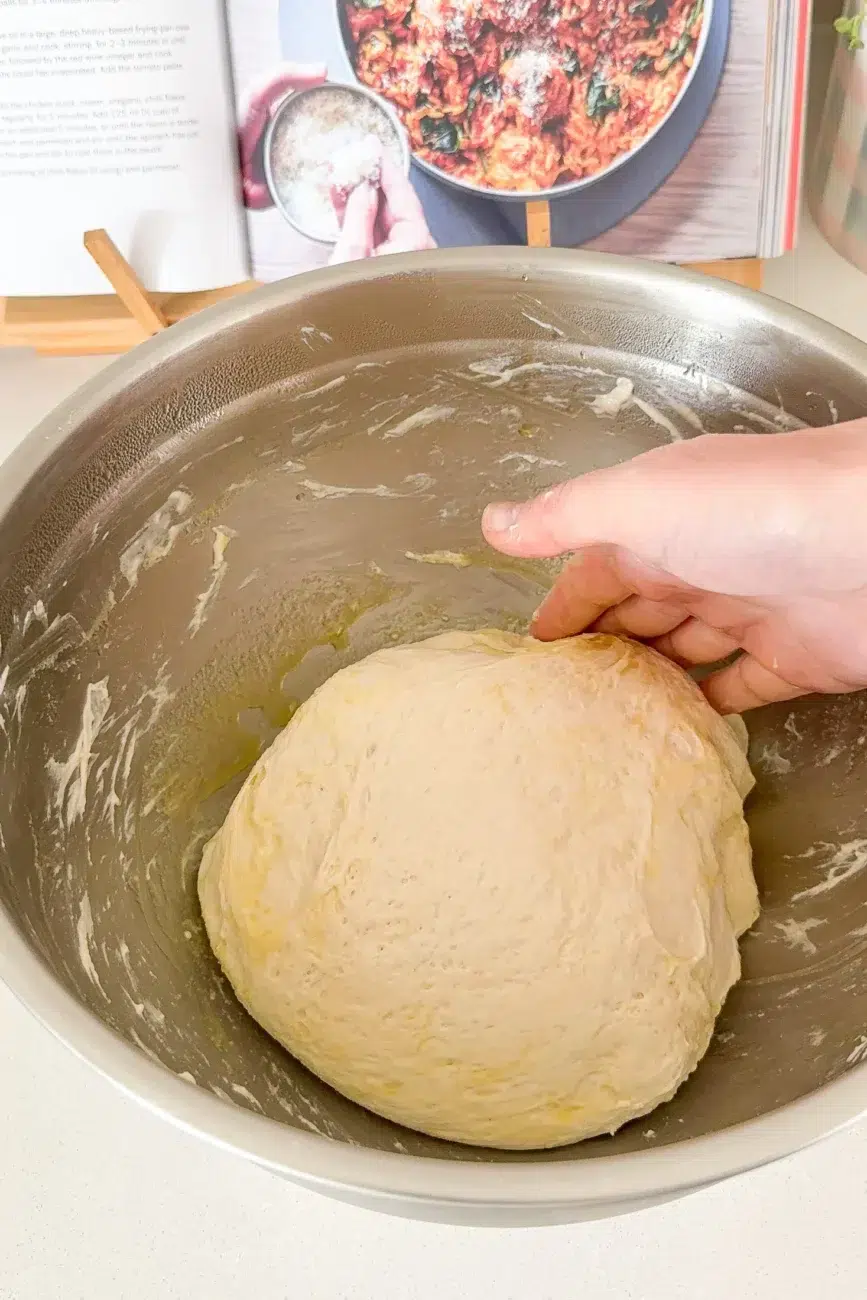
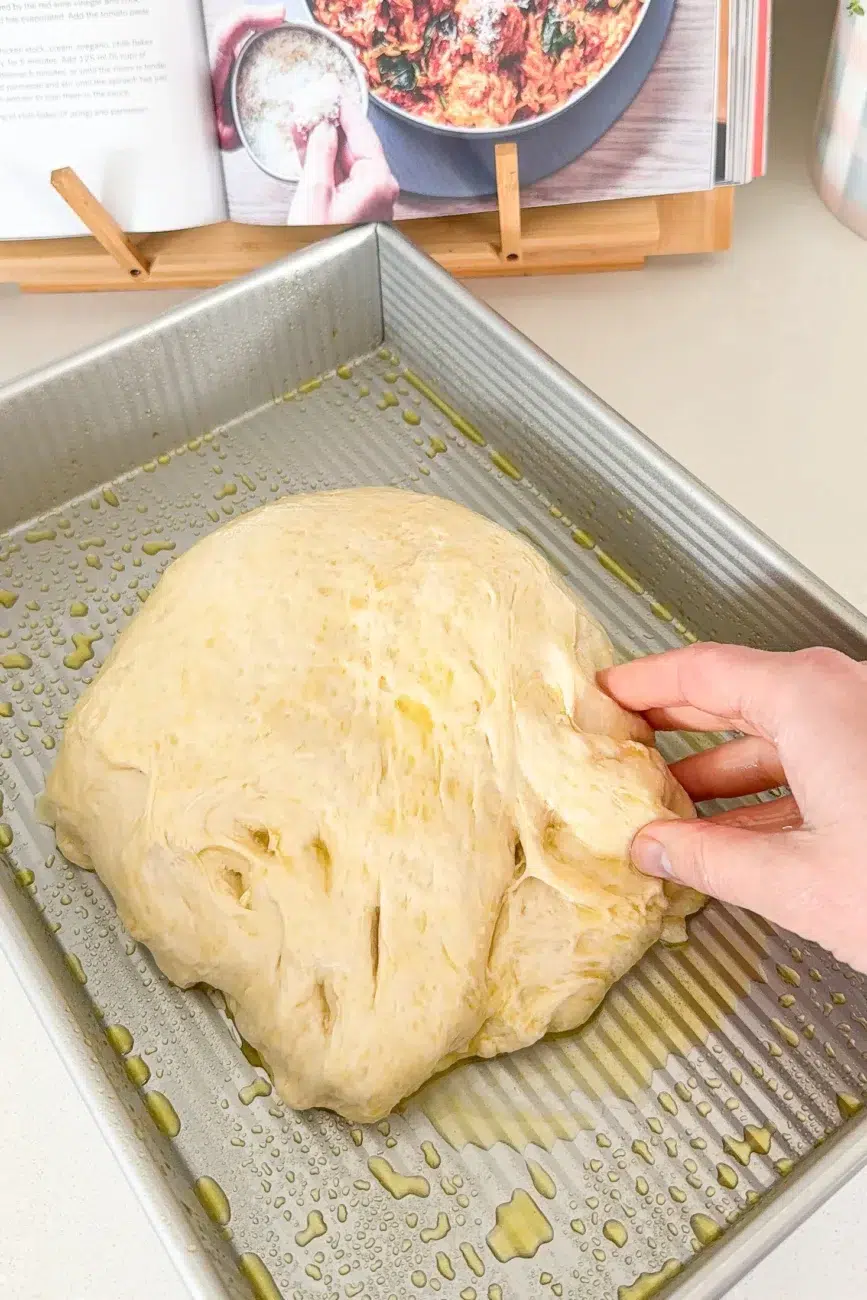
- Stretch and fold the cold dough – Remove the dough from the fridge. With one lightly oiled hand, gently loosen the dough from the sides of the bowl. Lift one edge, stretch it upwards and fold it towards the centre. Rotate the bowl and repeat another seven times. Work gently to avoid knocking out too much air.
- Prepare the baking tin – Generously spray a 23 x 33 cm (9 x 13 inch) metal baking tin with olive oil, making sure to coat the base and sides. Add 1½ tablespoons of olive oil to the centre of the tin (see note 4 for baking tin options).
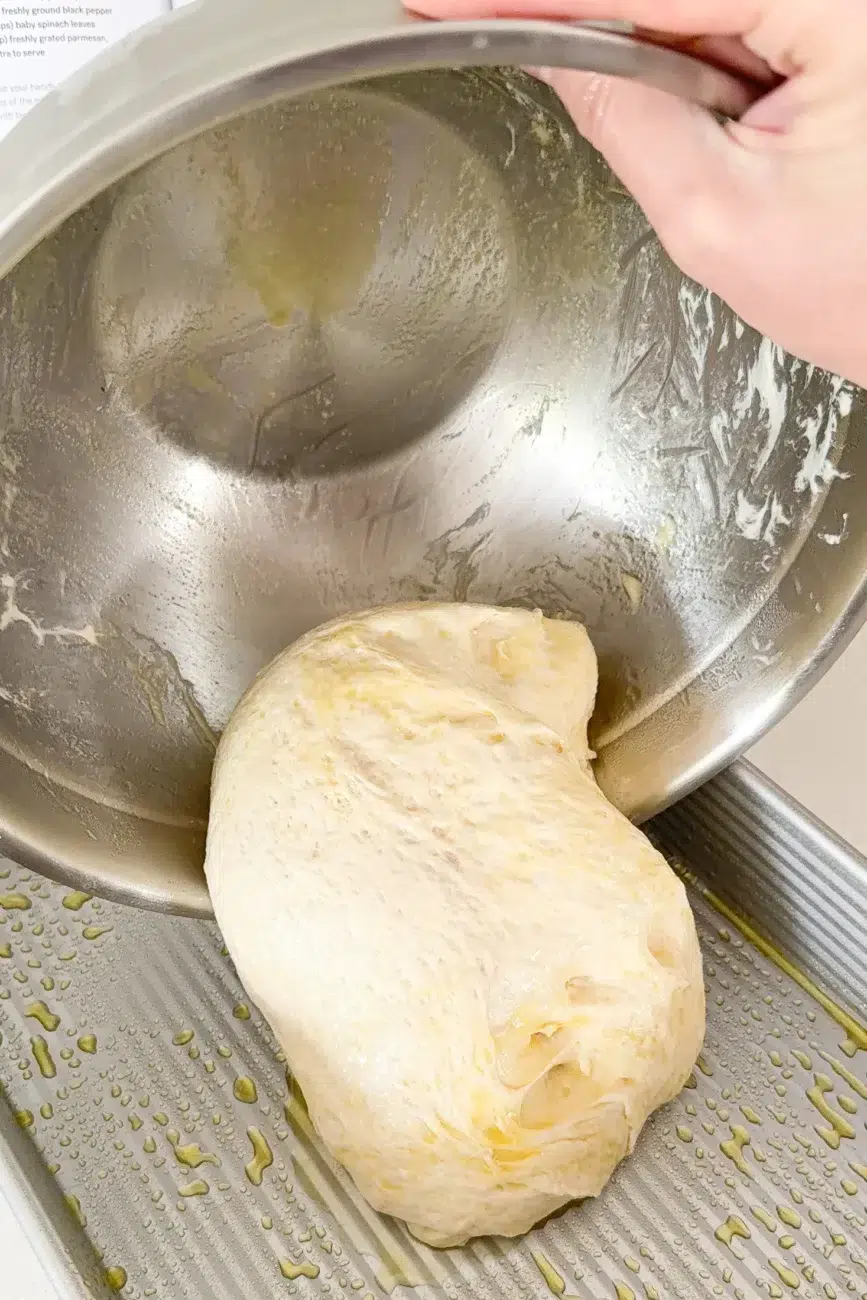
- Transfer the dough to the tin – Gently transfer the cold dough into the prepared tin. Carefully turn it over once so both sides are coated in olive oil. Don't punch the dough down or force it into the corners – it will spread naturally as it rests.
- Allow the dough to rise – Leave the dough uncovered at room temperature for approximately 3–4 hours, or until noticeably puffy, airy and bubbly, and it has spread towards the edges of the tin. If you gently shake the tin, the dough should wobble slightly. A cooler kitchen may require a little longer, so use the appearance of the dough as your guide rather than relying only on the time.
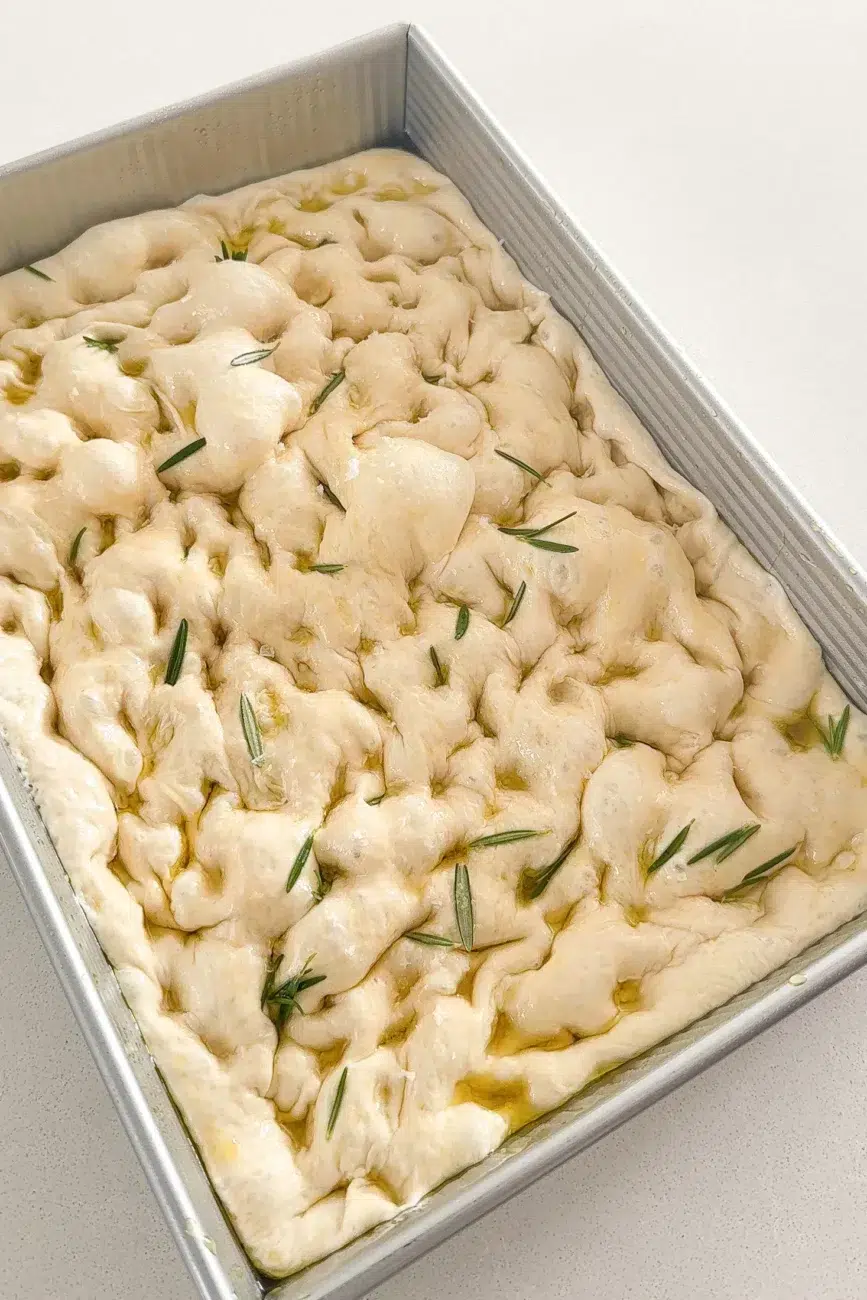
- Preheat the oven and add the toppings – Preheat the oven to 220°C (425°F) (200°C/400°F fan-forced). Drizzle the remaining 1½ tablespoons of olive oil evenly over the dough and scatter with the rosemary. Lightly oil your fingers, then press firmly down into the dough to create deep dimples across the surface. You can gently encourage the dough towards the corners as you go, but avoid flattening it completely. Finish with a generous sprinkle of sea salt flakes.
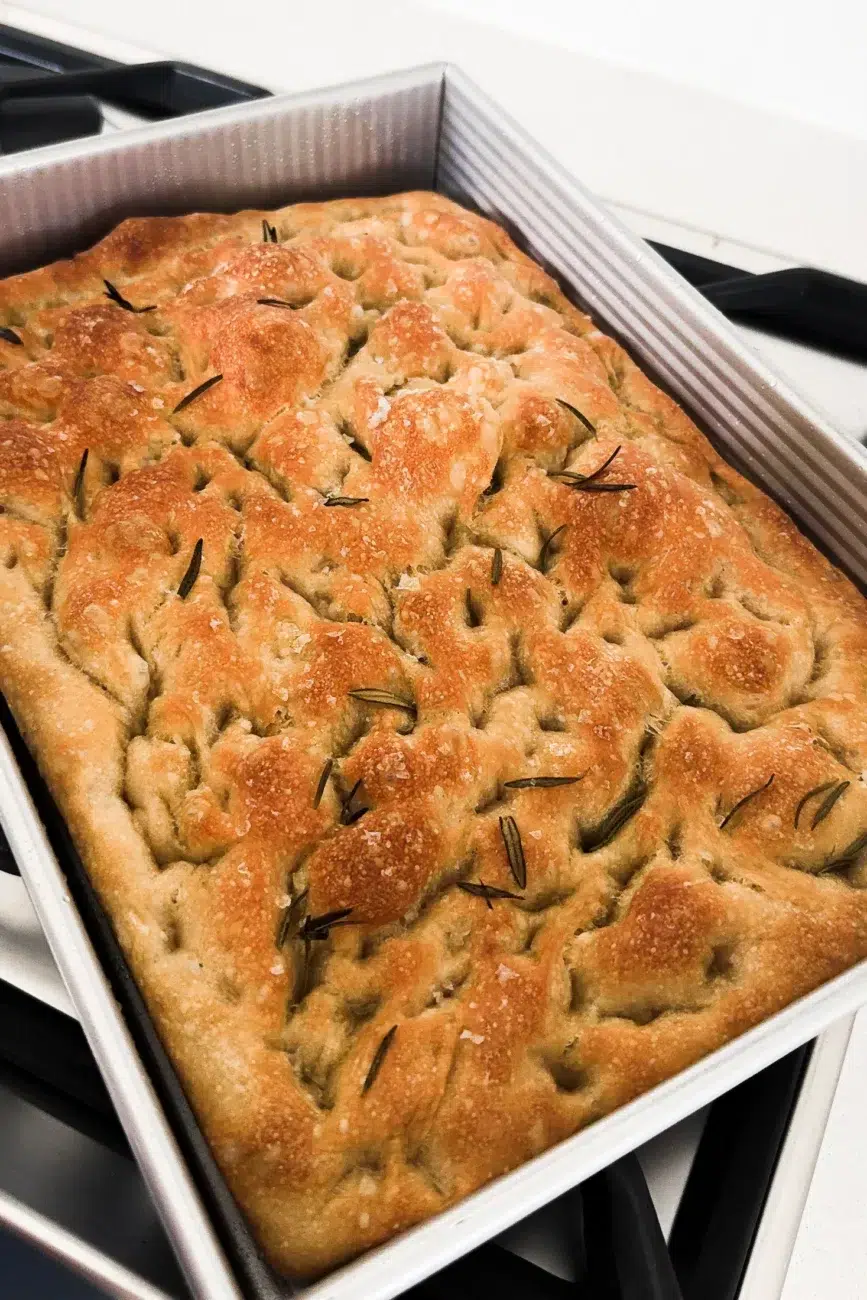
- Bake – Transfer the tin to the middle rack of the oven and bake for 25–30 minutes, or until deeply golden on top with crisp edges and a golden base. I find that my focaccia is cooked through at around 25 minutes, with the final 5 minutes mainly helping to develop that beautiful golden colour and crisp crust. Keep an eye on it towards the end, as ovens vary. Carefully lift one edge with a spatula to check that the underside is golden before removing it from the oven.
Watch how to make it
Nutrition information
Nutritional information on this site is calculated using Foodworks Professional, the nutrition analysis software trusted by dietitians, researchers and food manufacturers across Australia and New Zealand. Disclaimer re gluten-free and dairy-free recipes.


























Leanne says:
Just pulled mine out of the oven, smells delicious 😋 yes it took a good 6 hours for mine to do the final rise only because the day was cool