


Easy, fluffy mini pizzas perfect for school lunches or quick snacks – freezer-friendly and ready in under 25 minutes!
These Mini Lunchbox Pizzas are a lifesaver for busy parents! And my kids are extra happy on the days that these delights make an appearance in their lunchboxes! It can be hard coming up with new ideas to ensure your kids don’t get tired of the same old sandwiches or typical school lunch options. We want them to eat and enjoy their lunch and know they are getting something that’s both delicious and satisfying. Pizzas might seem a decadent choice, but when they are homemade from scratch and topped with fresh ingredients, you can feel good that you’re providing your kids with a nutritious option that they love.

With just two simple ingredients in the dough, you’ll have these fluffy, protein-packed pizzas ready in no time. The dough is quick to mix, no special equipment needed – just your hands! The result is a soft base, similar to focaccia, and the Greek yoghurt adds extra protein to keep the kids fuller for longer.
The best part? You can top these pizzas with anything you like (make them veggie-only if you want!), and they’re ready in less than 25 minutes. You could even get the kids to top their own pizzas with their favourite ingredients! Cook them ahead of time, freeze them and pop them into the kids’ (and adults’!) lunchboxes during the week – perfect served hot or cold!

What other toppings can I use for these Mini Lunchbox Pizzas?
I love how versatile these pizzas are. Some of our favourite toppings include sliced ham, pineapple, sliced mushrooms, diced capsicum (bell peppers), baby spinach, semi-dried (sun-blushed) tomatoes or leftover cooked chicken. To sneak some extra greens onto the pizza, add some grated zucchini (courgette), which will melt in with the cheese.
How can I make these pizzas even more fun for my kids?
Rather than just making the pizzas round, you could form the dough into any shapes you like from oval to square or even diamond. For younger kids, you could even use fun-shaped large cookie cutters for the dough, such as cat or dog faces.

Can I make these pizzas in an air fryer?
Yes! If you want to make these in an air fryer, preheat it to 180°C (350°F) and cook the pizzas for 8–10 minutes, or until the dough is golden and the cheese is melted.
Watch how to make Mini Lunchbox Pizzas
If you enjoyed Mini Lunchbox Pizzas, I think you’ll love:
Cheesy Corn Fritters Recipe
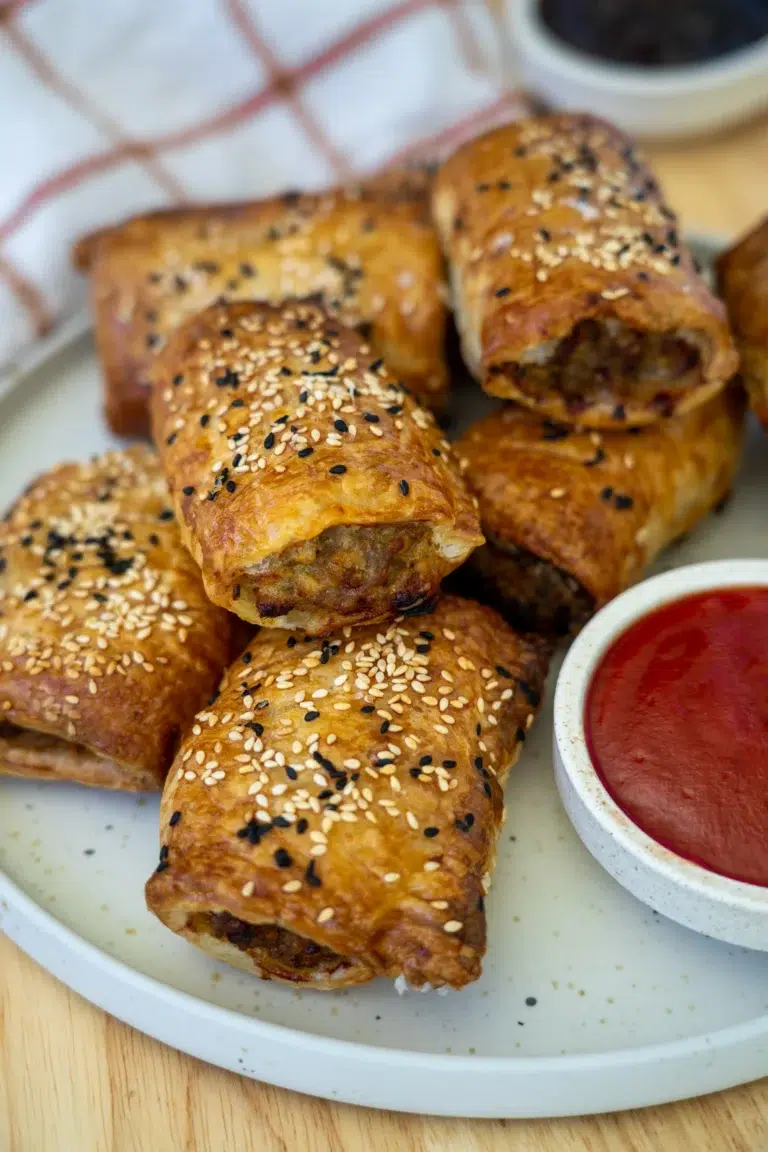
The BEST Homemade Sausage Rolls Recipe
Spinach and Feta Rolls Recipe
Spinach and Feta Triangles Recipe
Mini Lunchbox Pizzas
“Just made these for lunch with my little one. Instant hit and super quick to make! And a fun way to encourage them to eat vegies as they decorate their own pizza.” Share PrintIngredients
- 300 g (2 cups) self-raising flour (see note 1 if you only have plain/all-purpose flour)
- 250 g (1 cup) full-fat plain Greek yoghurt
- 90 g (⅓ cup) tomato paste
- 125 g (1 cup) freshly shredded mozzarella
- 80 g (½ cup) pepperoni
Instructions
- Preheat the oven to 200°C (400°F) (180°C/350°F fan-forced). Line a baking tray with baking (parchment) paper.
- Make the dough – In a large bowl, combine the self-raising flour and yoghurt. Mix with a spoon until the mixture resembles large flakes, then combine with your hands, kneading until a soft dough forms (this will take about 1–2 minutes, see note 2 for further instructions and troubleshooting).
- Cut out the pizza bases – Lightly flour a clean work surface and roll out the dough to about a 1 cm (½ inch) thickness. Use a large mug or cookie cutter to cut out rounds (or you can make one large pizza instead). Combine any leftover dough scraps using your hands, roll out again and use your cutter to create more rounds. Repeat this process until there is no dough left.
- Place the dough rounds on the prepared baking tray (use two baking trays if needed). Spread a small amount of tomato paste over each round.
- Add the toppings – Top with shredded mozzarella, followed by the pepperoni.
- Cook – Bake for 12–14 minutes, or until the dough is golden and the cheese has melted (if using two trays, place one in the top and one in the bottom of the oven, there is no need to swap them during cooking).
- Serve – Allow to cool slightly on the tray before serving.
Nutrition information
Disclaimer re gluten-free and dairy-free recipes


Clare says:
These are great! So simple to make. I was worried the dough was too shaggy but it just takes a while to come together. I actually forgot this was a cookie-cutter situation and not a roll the dough situation so I made balls then rolled them out individually. The edges were irregular and I re-read the recipe, kneaded everything back together and cut out the crusts, I was worried I overworked the dough but they still rose great and were puffy. I like that you don’t have to fuss about with yeast but you still get some puff, there’s no waste with the dough scraps, you can make the crusts any size, and you can just use whatever cutter you have available (I used a bowl and made 6 crusts).
Nicole says:
Hi Clare, thanks so much for sharing this. I just love hearing how your cooking experience went and I’m so happy they worked out for you! Nic x
Julie says:
Delicious, yet easy….I needn’t say more. I used natural yoghurt because that’s what I had in the fridge. Delicious (worth saying twice).
Nicole says:
Hi Julie, I’m so glad these worked out for you with the regular yoghurt. And thanks for your lovely comments. Nic x
Dee says:
Thank you for the recipe! I bake every day and found this dough to be very hard to work with – even after kneading for several minutes. I also found that the dough needed salt. The recipe I often use (for bagels but could be used for pizza dough) – is one cup of flour per one cup of yogurt (plus 3/4 t. salt) which makes for a much easier to work with dough. Not quite a hit for me, unfortunately.
Becky says:
Super simple and delicious. I have made mini pizzas like this many times with proper dough and I was a little nervous that this simple recipe wouldn’t taste the same. It really does taste the same. I don’t think you could tell the difference and this is much easier than having proper dough on hand. Great recipe. I didn’t have self rising flour on hand, so I just added baking powder and salt. Worked perfectly.
Nicole says:
Hi Becky, I’m so happy to hear you enjoyed these! Nic x
Milly says:
Can I heat them up in the airfryer straight from frozen?
Nicole says:
Hi Milly, yep, you sure can! Nic x
zandile N Mbatha says:
Quick and easy, thank you
Nicole says:
So glad you enjoyed them!! xx
Amber says:
Thanks, going to try this weekend. How do you put into lunch boxes? Defrost in fridge overnight and then into lunch box? Or do you re heat in the morning and wrap and put in lunch box? Thanks
Nicole says:
Hi Amber, yes, I serve them cold. If they’re frozen, I thaw them in the fridge overnight and pop them in the lunchboxes in the morning as they are. xx
Ahrima says:
Should I bake it in the middle oven rack or lowest? I always mess it up
Nicole says:
Hi Ahrima, this recipe is super forgiving, so you could probably pop the tray anywhere in the oven! However, either the middle or above would be best. If you are using two trays, you can place one at the bottom and one at the top and there’s no need to swap them around. I hope this helps. xx
Elma says:
May God bless you !! Really so nice, i made it too😍😍😍🥰🥰👍🏻👍🏻👍🏻
Nicole says:
Aw, thank you so much! So glad you enjoyed the pizzas. xx
Shirley says:
Looks easy & yummy! Would I be able to freeze uncooked dough and bake only what I need each time?
Nicole says:
Hi Shirley, I am testing this and will add the results to the recipe when I’ve checked. Thank you so much for your excellent question! xx
Jen says:
These are amazing and so easy! The kids have gotten into it as well and they enjoy putting on their own toppings and making their lunch pizzas before school.
Lisa says:
Can I ask why tomato paste and not pizza sauce? I’m a little scared to make so many and have it turn out with too intense tomato-y flavor.
Nicole says:
Hi Lisa, I prefer the flavour of tomato paste, but you can definitely use pizza sauce if you like! xx
Nicole says:
Fantastic! What a great idea to get the kids to load up their own toppings! I might add that to the recipe it’s such a great idea! Thank you xx
Carolyn says:
These were delicious, kids loved them. Even the fussy one, hooray! Any tips for stopping the dough rising in the centre, while cooking, and the pepperoni sliding off?
Nicole says:
Hi Carolyn, I am so glad you enjoyed the pizzas! If the dough is very puffy, before baking I press the pizza base dough down in the centre with the heel of my hand to flatten it a bit. I hope that works for you! xx