


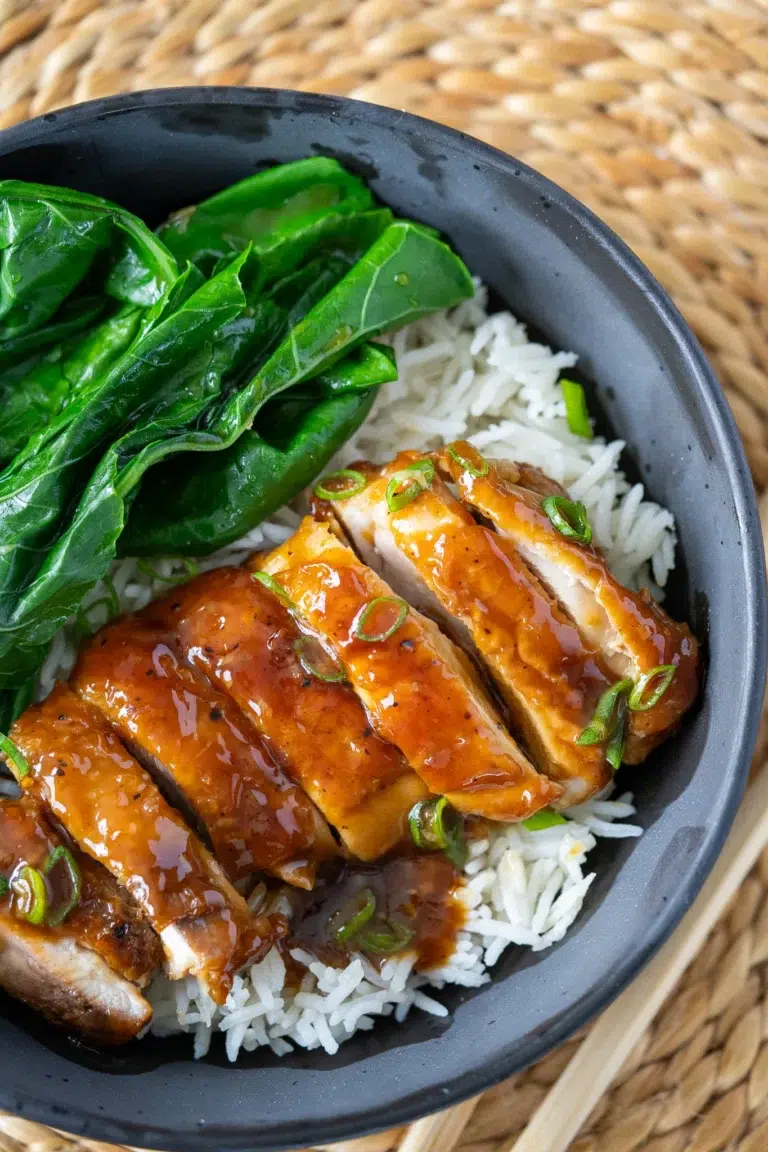
This Crispy Sweet Chilli Chicken is a great, simple dinner option that you can get on the table quickly the next time you are craving takeaway – especially that incredible crispy, crunchy chicken from your favourite Chinese restaurant.

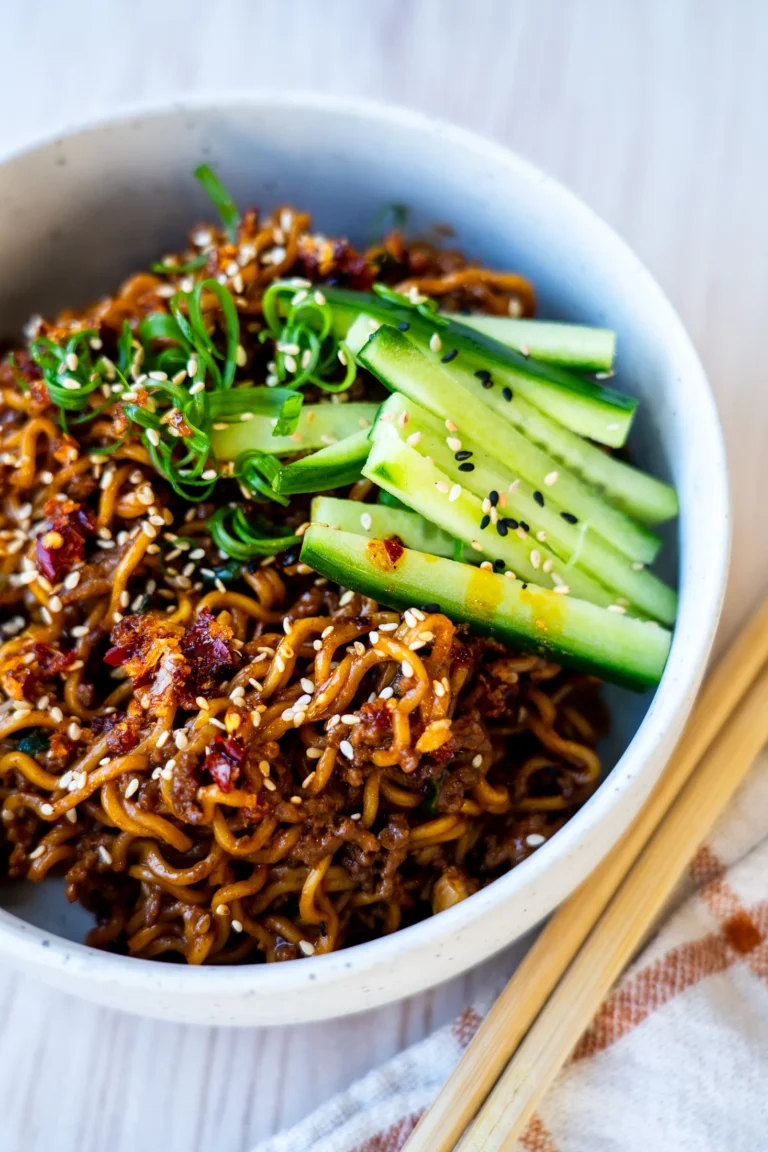
This is good. SERIOUSLY good. It’s easy, filling, low-cost and absolutely delicious and, because you are making it yourself, you’ll know exactly what’s going into it! The chicken is cooked to crispy, golden perfection before being coated in a sticky, sweet chilli glaze.
This meal uses just one pan (hooray to no mountain of washing up!) and is on the table in less than 20 minutes with minimal effort and fuss. I serve it with steamed rice and, although you could plate it up with any vegetables you like – steamed Asian greens would be the ideal choice – I love the crisp freshness (and speed!) of sliced cucumbers as an accompaniment, as they are the perfect foil to the sticky-coated chicken. And the sprinkle of sesame seeds at the end is such a simple touch, but it seems to take the dish to a new level of elegance.
For more crispy, flavour-packed dinners ready in no time, browse my 30+ Easy Dinner Ideas.
Can I air fry Crispy Sweet Chilli Chicken?
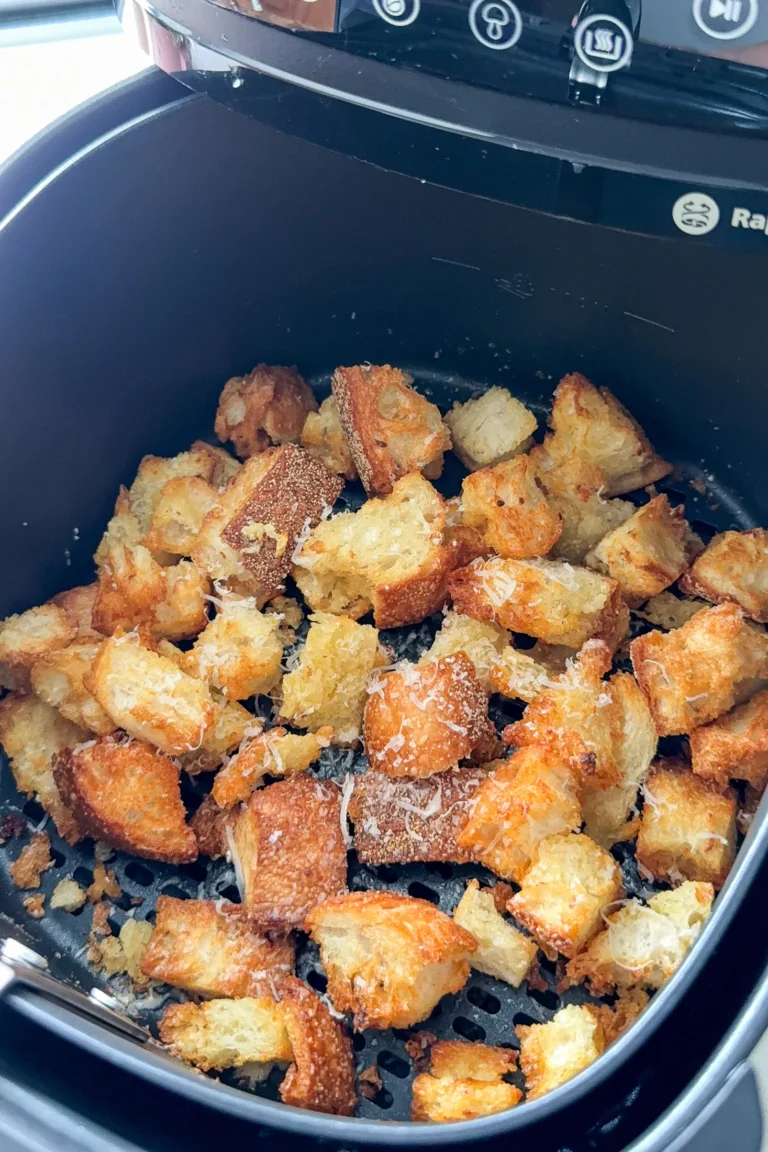
Yes, this recipe can be cooked in the air fryer, but you will need to modify the recipe slightly. Coat the chicken as per the recipe, excluding the cornflour (cornstarch). Once the chicken is coated in the egg and spice mixture, dip each piece of chicken, one by one, into the cornflour so that it is evenly coated. Place in a single layer in the air fryer and spray generously with oil so that the entire piece of chicken is moistened. Air fry at 200°C (400°F) for 6–8 minutes or until the chicken is cooked through. Cook the sauce as per the recipe and coat the chicken to serve.
What can I serve with Crispy Sweet Chilli Chicken?
Because the sauce is rich and sweet, I like to keep the sides simple. I have suggested serving the chicken with steamed rice, but you could serve noodles or even cauliflower rice. Steamed green vegetables are also ideal, especially Asian greens like bok choy, choy sum or Chinese broccoli (gai lan), or green beans, sugar snap peas, broccolini (tenderstem broccoli) or broccoli.
If you enjoyed Crispy Sweet Chilli Chicken, I think you’ll love:
Crispy Honey Soy Chicken Recipe
Bang Bang Chicken Recipe
Cheat’s Chicken Laksa Recipe
Nasi Goreng (Indonesian Fried Rice) Recipe
Chicken Satay Skewers Recipe
Crispy Sweet Chilli Chicken
“I absolutely loooooved this recepie!!! Very easy and delicious!” Share Pin Recipe PrintIngredients
- 600 g (1¼ lb) boneless, skinless chicken breast or chicken thigh, cut into bite-sized pieces
- 1 tsp sweet paprika
- 1 tsp garlic powder
- ½ tsp sea salt flakes
- ½ tsp freshly cracked black pepper
- 1 egg
- 60 g (½ cup) cornflour (cornstarch)
- Oil, for frying (see note 1)
- 1 tsp freshly minced garlic
- 1 tsp freshly minced ginger
- 125 ml (½ cup) sweet chilli sauce
- 60 ml (¼ cup) tamari or all-purpose soy sauce
- 60 ml (¼ cup) rice wine vinegar, apple cider vinegar or lime juice, see note 2
- Steamed rice
- 1 spring onion (scallion), finely sliced
- 1 tsp sesame seeds
Instructions
- Coat the chicken – Place the chicken in a large bowl with the sweet paprika, garlic powder, salt, pepper, egg and cornflour. Mix the chicken well until the other ingredients form a paste around it. Set aside.
- Combine the sauce ingredients – To make the sauce, combine all the ingredients in a medium bowl. Set aside.
- Brown the chicken – Heat the oil over medium–high heat in a large, deep, heavy-based frying pan. Cook the chicken for 5–6 minutes or until it is cooked through and golden all over, turning once halfway through. Set aside on a paper towel to drain excess oil.
- Drain the oil from the frying pan and wipe the pan clean.
- Cook the chicken in the sauce – Heat the pan over medium–low heat and add the sauce. Stir for 2–3 minutes until the sauce begins to bubble gently and thicken. Turn the heat off and return the chicken to the pan, stirring so that it is evenly coated in the sauce.
- Serve – Serve the chicken immediately, heaped on top of steamed rice. Top with finely sliced spring onion and a sprinkle of sesame seeds.
- Optional: Add 1–2 tablespoons of boiling water (from the kettle) to the bottom of the pan once the chicken has been removed. Use a spoon to stir the water into the remaining sauce and use this extra sauce to pour over the completed dish.
- Coat the chicken – Coat the chicken in the egg, spices and seasoning as per the recipe – but don’t add the cornflour yet.
- Once coated, dip each piece individually into the cornflour so it’s well covered. This step gives that signature crispy coating.
- Cook the chicken – Spray the base of your air fryer basket with oil. Place the chicken in a single layer in the basket and spray generously with oil so the surface is completely covered.
- Air fry at 200°C (400°F) for 6–8 minutes, shaking the basket or turning the pieces halfway through cooking time, until golden and cooked through.
- Make the sauce – Meanwhile, make the sauce on the stovetop as per the recipe, then toss the crispy chicken through the sauce to serve.
Nutrition information
Disclaimer re gluten-free and dairy-free recipes


Michelle says:
What vegetables could
You add
Nicole says:
Hi Michelle, you certainly could add some vegetables, but I actually prefer serving them on the side with this recipe to help keep the chicken nice and crispy. 😊 Steamed broccoli, green beans, snow peas or a simple salad would all work beautifully alongside it. ♥️
Catherine says:
So easy to make and 100% delicious!!
To make it a bit more macro friendly I used Mingle sweet chili sauce, and Niulife Soy Not Soy to dramatically reduce the sodium. These changes did not affect the taste at all.
Claudine says:
Easy recipe to follow but way too much vinegar which made the sauce acidic/vinegary. Disappointing end result.
Nicole says:
Hi Claudine, oh no! I’m so sorry to hear this one wasn’t a winner. The flavour/sweetness and acidity in the other ingredients can affect the end flavour, as well as how long the sauce reduces. It needs a bit of time to reduce and sweeten. Thank you for your comment as I will add some extra notes to the recipe. 🙏
Rebecca says:
Just made this for dinner and it was a hit! Wouldn’t have taken me so long to make if I didn’t have to fry the chicken in so many batches. Next time I’ll use a bigger pan 😂 I also kept the sauce on the side until serving so the chicken stayed crispy.
Nicole says:
Hi Rebecca, thanks so much for your comment! Cooking in batches is the secret to keeping that crispiness – a bigger pan next time will definitely help! And keeping the sauce on the side for serving is such a smart move. So glad it was a hit! Nic x
Merjem says:
I love it! So easy, ao delicious
Nicole says:
Hi Merjem, thanks so much for your comment! So happy you loved it — it really is such an easy one! Nic x
Sylv :) says:
Made this tonight and everyone loved it. I used reduced salt soy and reduced sugar sweet chilli as I’m trying to cut the cals down, but it still tasted amazing!! A little on the sweet side for me still, but that’s more a preference than the recipe itself. Will definitely attempt this again – next time my chicken will be extra crisp! (I was afraid of the oil haha)
Nicole says:
Hi Sylv, thanks so much for your comment! So glad everyone loved it! Using reduced salt soy and reduced sugar sweet chilli is a great idea if you’re watching the calories. If you find it a touch sweet for your taste, you could try adding a tiny splash more soy or a squeeze of lime to balance it out next time. Nic x
Ben says:
Love the recipe! Air fryer settings probably need to be adjusted as I couldn’t replicate the pan crispness 😢
Nicole says:
Hey Ben, thanks so much for your message! For the air fryer, the key is definitely spraying generously with oil so the coating gets nice and crispy. Air fry at 200°C (400°F) for 6–8 minutes until cooked through, or go a little longer if needed. The pan method will always be the crispiest 😊 but for quick weeknight cooking, the air fryer is usually my go-to! Nic x
Allison Campbell says:
OMG yum!!! Another hit from Nicole. This was quick and quite easy and so very yummy. I added broccoli, just for the extra veggie serving. Can’t wait to make this again!
Nicole says:
Hi Allison, thanks so much for your comment! Adding broccoli is a great call – extra veggies are always a win! So glad it was a hit. Nic x
Sheila says:
Easy to make, chicken turned out great but sauce way too salty for me.
Kerry says:
So yummy Nicole. This will definitely go on a rotation for my family. They loved it 🥰 I have a lot of fussy eaters in my house!!!
Nicole says:
This is wonderful to hear, Kerry! Love winning over fussy eaters! Thanks for the rating too. ❤️ Nic x
Carol says:
Chicken wasn’t crispy & sauce was a bit too tart. Would probably try in air fryer next time.
Nicole says:
Hi Carol, I’m sorry this one didn’t work out for you. If the chicken didn’t go crispy, it’s usually one of two things – either the oil wasn’t hot enough before the chicken went in, or the pan was a little overcrowded. The oil needs to be pretty hot so the coating seals straight away, and the chicken pieces need space around them so they fry rather than steam. You might want to reduce the amount of vinegar in the sauce, too. I really hope these tips help if you make it again. ❤️ Nic x
Courtney says:
Hello just wondering for recipies like this we can’t use egg? Are their any other options I could use?
Nicole says:
Hi Courtney 😊
Yes, absolutely! The egg helps the coating stick, but you can swap it. You could use:
• 2 tablespoons plain yoghurt
• 2 tablespoons milk mixed with 1 teaspoon plain (all-purpose) flour (whisk until smooth)
The goal is just something slightly wet to help the coating cling. It may be very slightly less puffy, but it will still crisp up beautifully once fried.
Hope that helps! ❤️ Nic x