


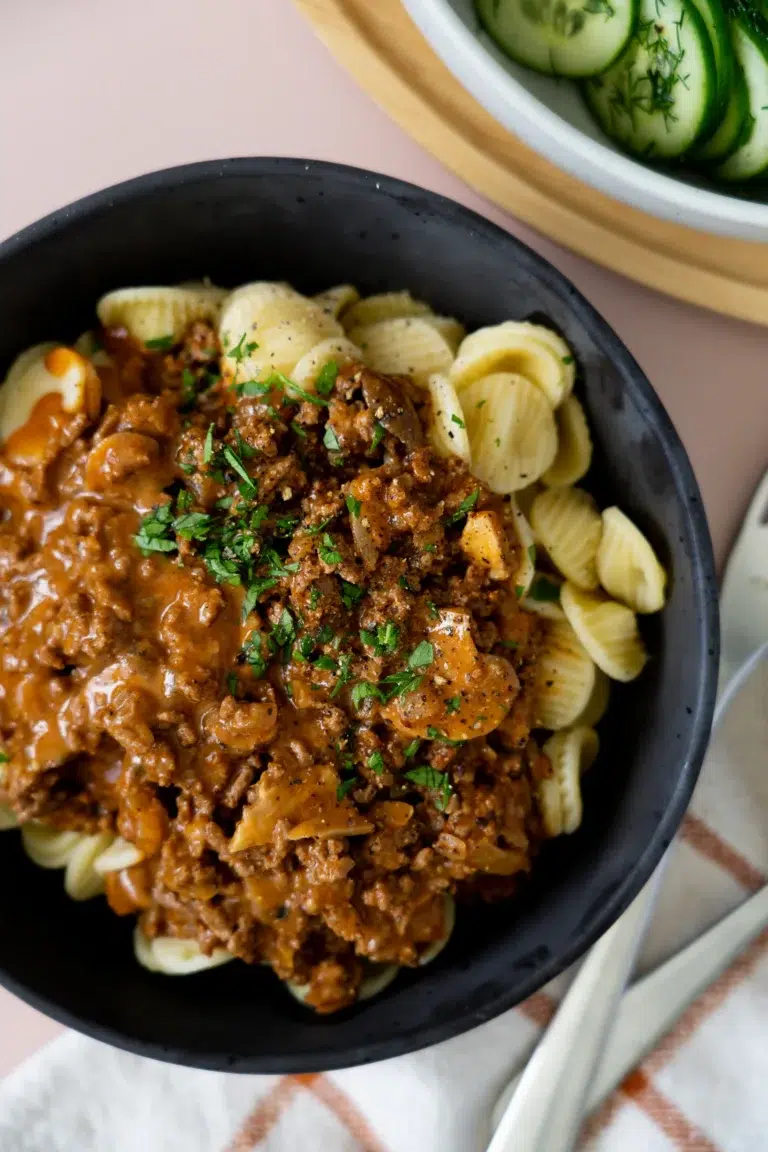
Juicy Beef Rissoles are high up there on the list of foods that my family loves eating. These are a “core meal” at our place – the type of meal you make with zero stress, knowing everyone will happily eat their dinner without complaints. But these are no ordinary, dry rissoles; they are flavour-packed and seriously delicious – juicy and tender on the inside with a golden moreish crust. I make a huge batch and freeze them, ready for when I need a quick dinner option when time isn’t on my side. I love this recipe so much that I included it in my new cookbook Simple Dinners Every Day.

These rissoles are incredibly versatile and you can serve them with almost anything across a wide range of meals, although my favourite way of serving them is with mashed potatoes and steamed veggies. The rissoles are made with low-cost ingredients that come together quickly and, above all, it’s an uncomplicated dinner – and you know I love uncomplicated things, especially on busy weeknights! Did I mention these double as a lunchbox filler? They can be enjoyed warm or cold.
While these are commonly known in Australia as rissoles (slightly flattened meatballs), I knew them as “faširani šnicli” (minced/ground meat schnitzel) growing up. My mum would make these at least once a week for dinner with a range of salads (like cabbage salad and bean salad) and they were always so delicious. Because their flavour is quite neutral, you can use these beef rissoles across a wide range of meals.

How can I serve Juicy Beef Rissoles?
I am big on cooking once and eating twice (maximum reward with minimal effort!). You can serve these Beef Rissoles with classic mashed potatoes and veggies, or you can choose one of these options:
- On a bun – Load the rissoles into a long roll with tomato salsa and grated cheese to make “subs”, or load them onto a hamburger bun with salads of choice.
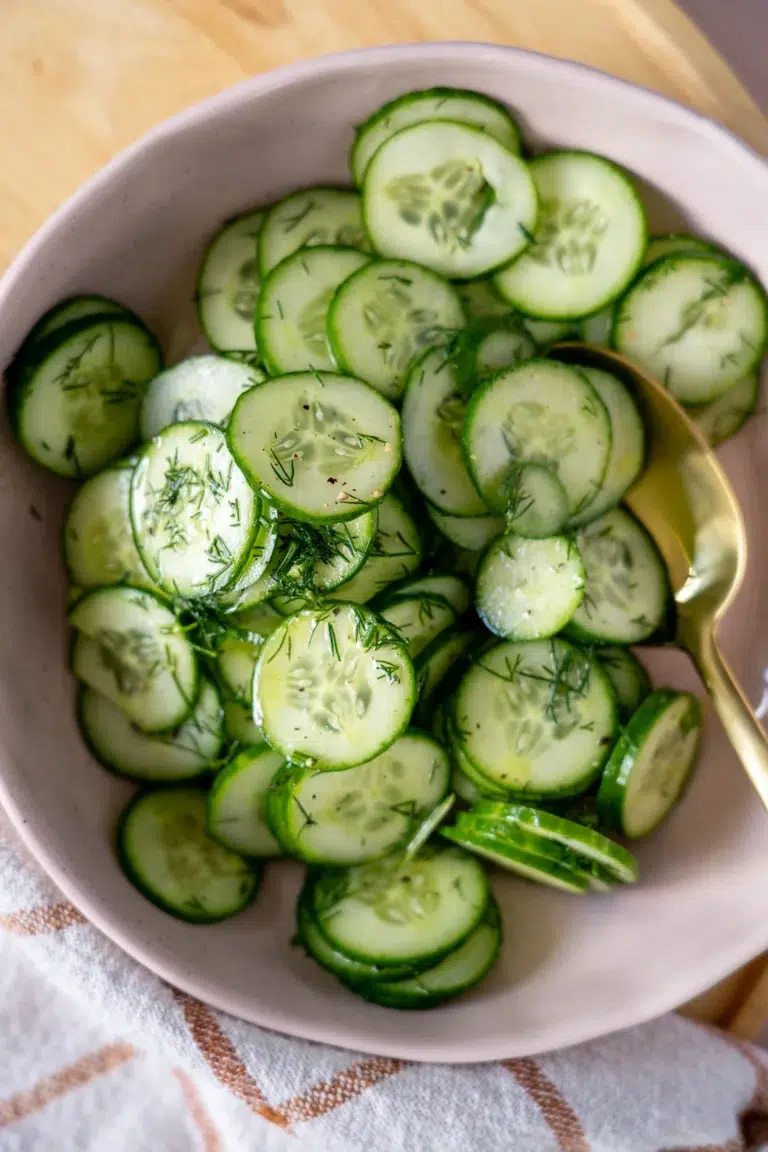
- With salad – Serve with coleslaw, a simple green salad or creamy potato salad.
- With vegetables – Pair with steamed vegetables – I love green beans, broccoli, broccolini (tenderstem broccoli), pumpkin, cauliflower, snow peas (mangetout), carrots or peas. Frozen vegetables also work well with these for extra-quick dinners!
- With rice – Serve the rissoles on a bed of rice (or rice noodles) with sliced cucumber, a drizzle of soy sauce and a dollop of mayonnaise.
- In a wrap – Load up the rissoles with shredded lettuce, diced tomato, guacamole and sour cream to give them a Mexican vibe!
- Other sides – Other delicious serving options are homemade wedges or fried rice. If you’re feeling extra fancy, a cheesy cauliflower bake or potato gratin would be amazing too!
Watch how to make Juicy Beef Rissoles
Meal prep it
This is the perfect recipe to make ahead of time. I like to refrigerate the rissoles in individual portioned containers with mashed potatoes and steamed broccolini (tender-stem broccoli). They last up to 3 days in the fridge. I reheat them in the microwave for extra-easy dinners.
Can I spice them up?
Yes! Try adding 1 teaspoon of crushed chilli (red pepper) flakes to the beef mixture, or serve with hot sauce or with spicy ajvar (a Balkan relish made primarily from capsicums/bell peppers, found in most major supermarkets).
If you enjoyed Juicy Beef Rissoles, I think you’ll love:
Swedish Meatballs Recipe
Risoni Mozzarella Meatballs Recipe
Loaded Burger Bowls Recipe
Homemade Beef Cevapi Recipe
Juicy Homemade Beef Burgers Recipe
Juicy Beef Rissoles
“OMG! Absolutely amazing and yummy. Gone in a minute. Try this ASAP it’s so good! Share PrintIngredients
- 500 g (1 lb) regular minced (ground) beef (can be substituted with minced pork or chicken)
- 1 onion, grated (see note 1)
- 1 tsp freshly minced garlic
- 1 egg
- 60 g (1 cup) panko breadcrumbs
- 1 tbsp ketchup
- 1 tbsp Worcestershire sauce
- ½ tsp freshly cracked black pepper
- 1 tsp salt or beef or chicken stock powder, bouillon (see note 2)
- 3 tbsp olive oil, for frying
- Freezer-Friendly Mashed Potatoes
- Steamed greens
- 1 tbsp finely chopped flat-leaf parsley
Instructions
- Make the rissole mixture – Add the minced beef, onion, minced garlic, egg, breadcrumbs, ketchup, Worcestershire sauce, pepper and salt or stock powder to a large mixing bowl. Use your hands to combine and roll the mixture into portions the size of golf balls. Flatten using the palm of your hand to form the rissoles.
- Cook the rissoles – Heat the olive oil in a large, heavy-based frying pan over medium–low heat. Cook the rissoles for 8–10 minutes until browned and cooked through, turning once halfway through. Cook in batches if you need to, so that the pan isn’t crowded – this will prevent the rissoles steaming in the pan and will ensure a golden crust. Set the rissoles aside on a plate.
- Make a gravy with the pan juices (optional) – Turn the heat off. Drain any excess oil from the bottom of the pan using a serving spoon and then, while the pan is still hot, add 2–3 tablespoons of water. Use a spoon to scrape up all of the pan drippings.
- Serve – Drizzle the pan juices over the rissoles and serve with your favourite sides.
- To cook the rissoles in an air fryer – Preheat your air fryer to 180°C (350°F) for about 3–5 minutes.
- Lightly spray or brush both sides of the rissoles with olive oil to ensure they brown evenly.
- Place the rissoles in a single layer in the air fryer basket, ensuring they are not touching. Cook in batches if needed to avoid overcrowding.
- Air fry the rissoles for 10–12 minutes, flipping them halfway through the cooking time. Quick note when air frying: must be made with regular minced (ground) beef, not lean as it’s too dry!
Nutrition information
Disclaimer re gluten-free and dairy-free recipes


Jen says:
Best rissoles ever!! Did in the air fryer and came out crispy and perfect (I didn’t add oil and put them on baking paper so natural oils/juices were enough). Looking forward to reheating for lunches this week. Thanks for the recipe!
Nicole says:
Wow, Jen, so happy you loved these! 🙌🏻 I have to admit I make these ALL the time! They definitely make delicious lunches! Thanks for the rating too. 🧡 Nic x
ColeeenK says:
This was a hit!! My fiancé loved it! ❤️
Nicole says:
So happy to hear this, Coleen! ❤️ Nic x
Elisa says:
We had for dinner tonight, OMG😋delicious. Easy to follow. Thank you 🤩
Nicole says:
Really happy to hear this, Elisa! ❤️ Nic x
Jess says:
Hi there – any suggestions of what I can swap out for the egg? My sons both have an egg allergy. Would a flax seed binder work here? Thanks!
Nicole says:
Hi Jess! Yes, absolutely 😊 You can use a flaxseed egg (1 tbsp ground flax + 2½ tbsp water, sit for 5 minutes), or even just a couple of tablespoons of milk + breadcrumbs to help bind. They’ll still be juicy and hold together really well! Nic x
Hamish says:
Delicious & simple vert tasty
Nicole says:
Happy you enjoyed these, Hamish! ❤️ Nic x
Elaine says:
Is the nutrition facts only for the rissoles or does it include the serve of mashed potato ?
Nicole says:
Hi Elaine, the stats include everything. ❤️ Nic x
Lee-Anne says:
Very good recipe and very easy to make..
Nicole says:
Love to hear this, Lee-Anne! Thanks for the rating too. ❤️ Nic x
Annalisa says:
Delicious
Nicole says:
So happy you enjoyed these Annalisa and thanks for the rating! 🥰 Nic x
Alanna says:
Absolutely delish! Husband said restaurant worthy! To me it reminded me of a really delicious meatloaf in a little round serving instead. Sooo good!
Nicole says:
I agree, Alanna! They’re like juicy little meatloaf balls! Yum. 🙌🏻 So happy you loved this and thanks for the rating. Nic x
Molly says:
Has anyone tried substituting the beef for ground pork, turkey or chicken?
Nicole says:
Hi Molly, I’ve tried these with pork and chicken and I can tell you that they’re still great! 🥰 Nic x
Maja says:
This has been in my weekly dinner rotation for two months now. It’s a sure fire meal my two picky kids (and hubby) will devour. Making it again tonight! This one’s a hit ❤️
Nicole says:
Hi Maja, I’m so happy to hear this. 🙌🏻 And, honestly, it’s the same at my place! Thanks so much for sharing and for the rating. Nic x
Gabrielle says:
Delicious. I have made them for myself and for a family brunch.
Nicole says:
So great to hear, Gabrielle! Thanks for the rating. Nic x